Guides

Connect Reyndex to Claude Desktop

Overview

Search your workspaces and candidates from Claude Desktop through a remote custom connector

Claude Desktop can only read workspaces and candidate data your Reyndex account can already access. It cannot change or delete data

Before you start

  • The MCP add-on active on at least one of your Reyndex workspaces
  • A Claude account that can add custom connectors

Connection URL

Paste this URL into Claude Desktop

https://mcp.reyndex.com/mcp/claude

Set up Claude Desktop

  1. 01

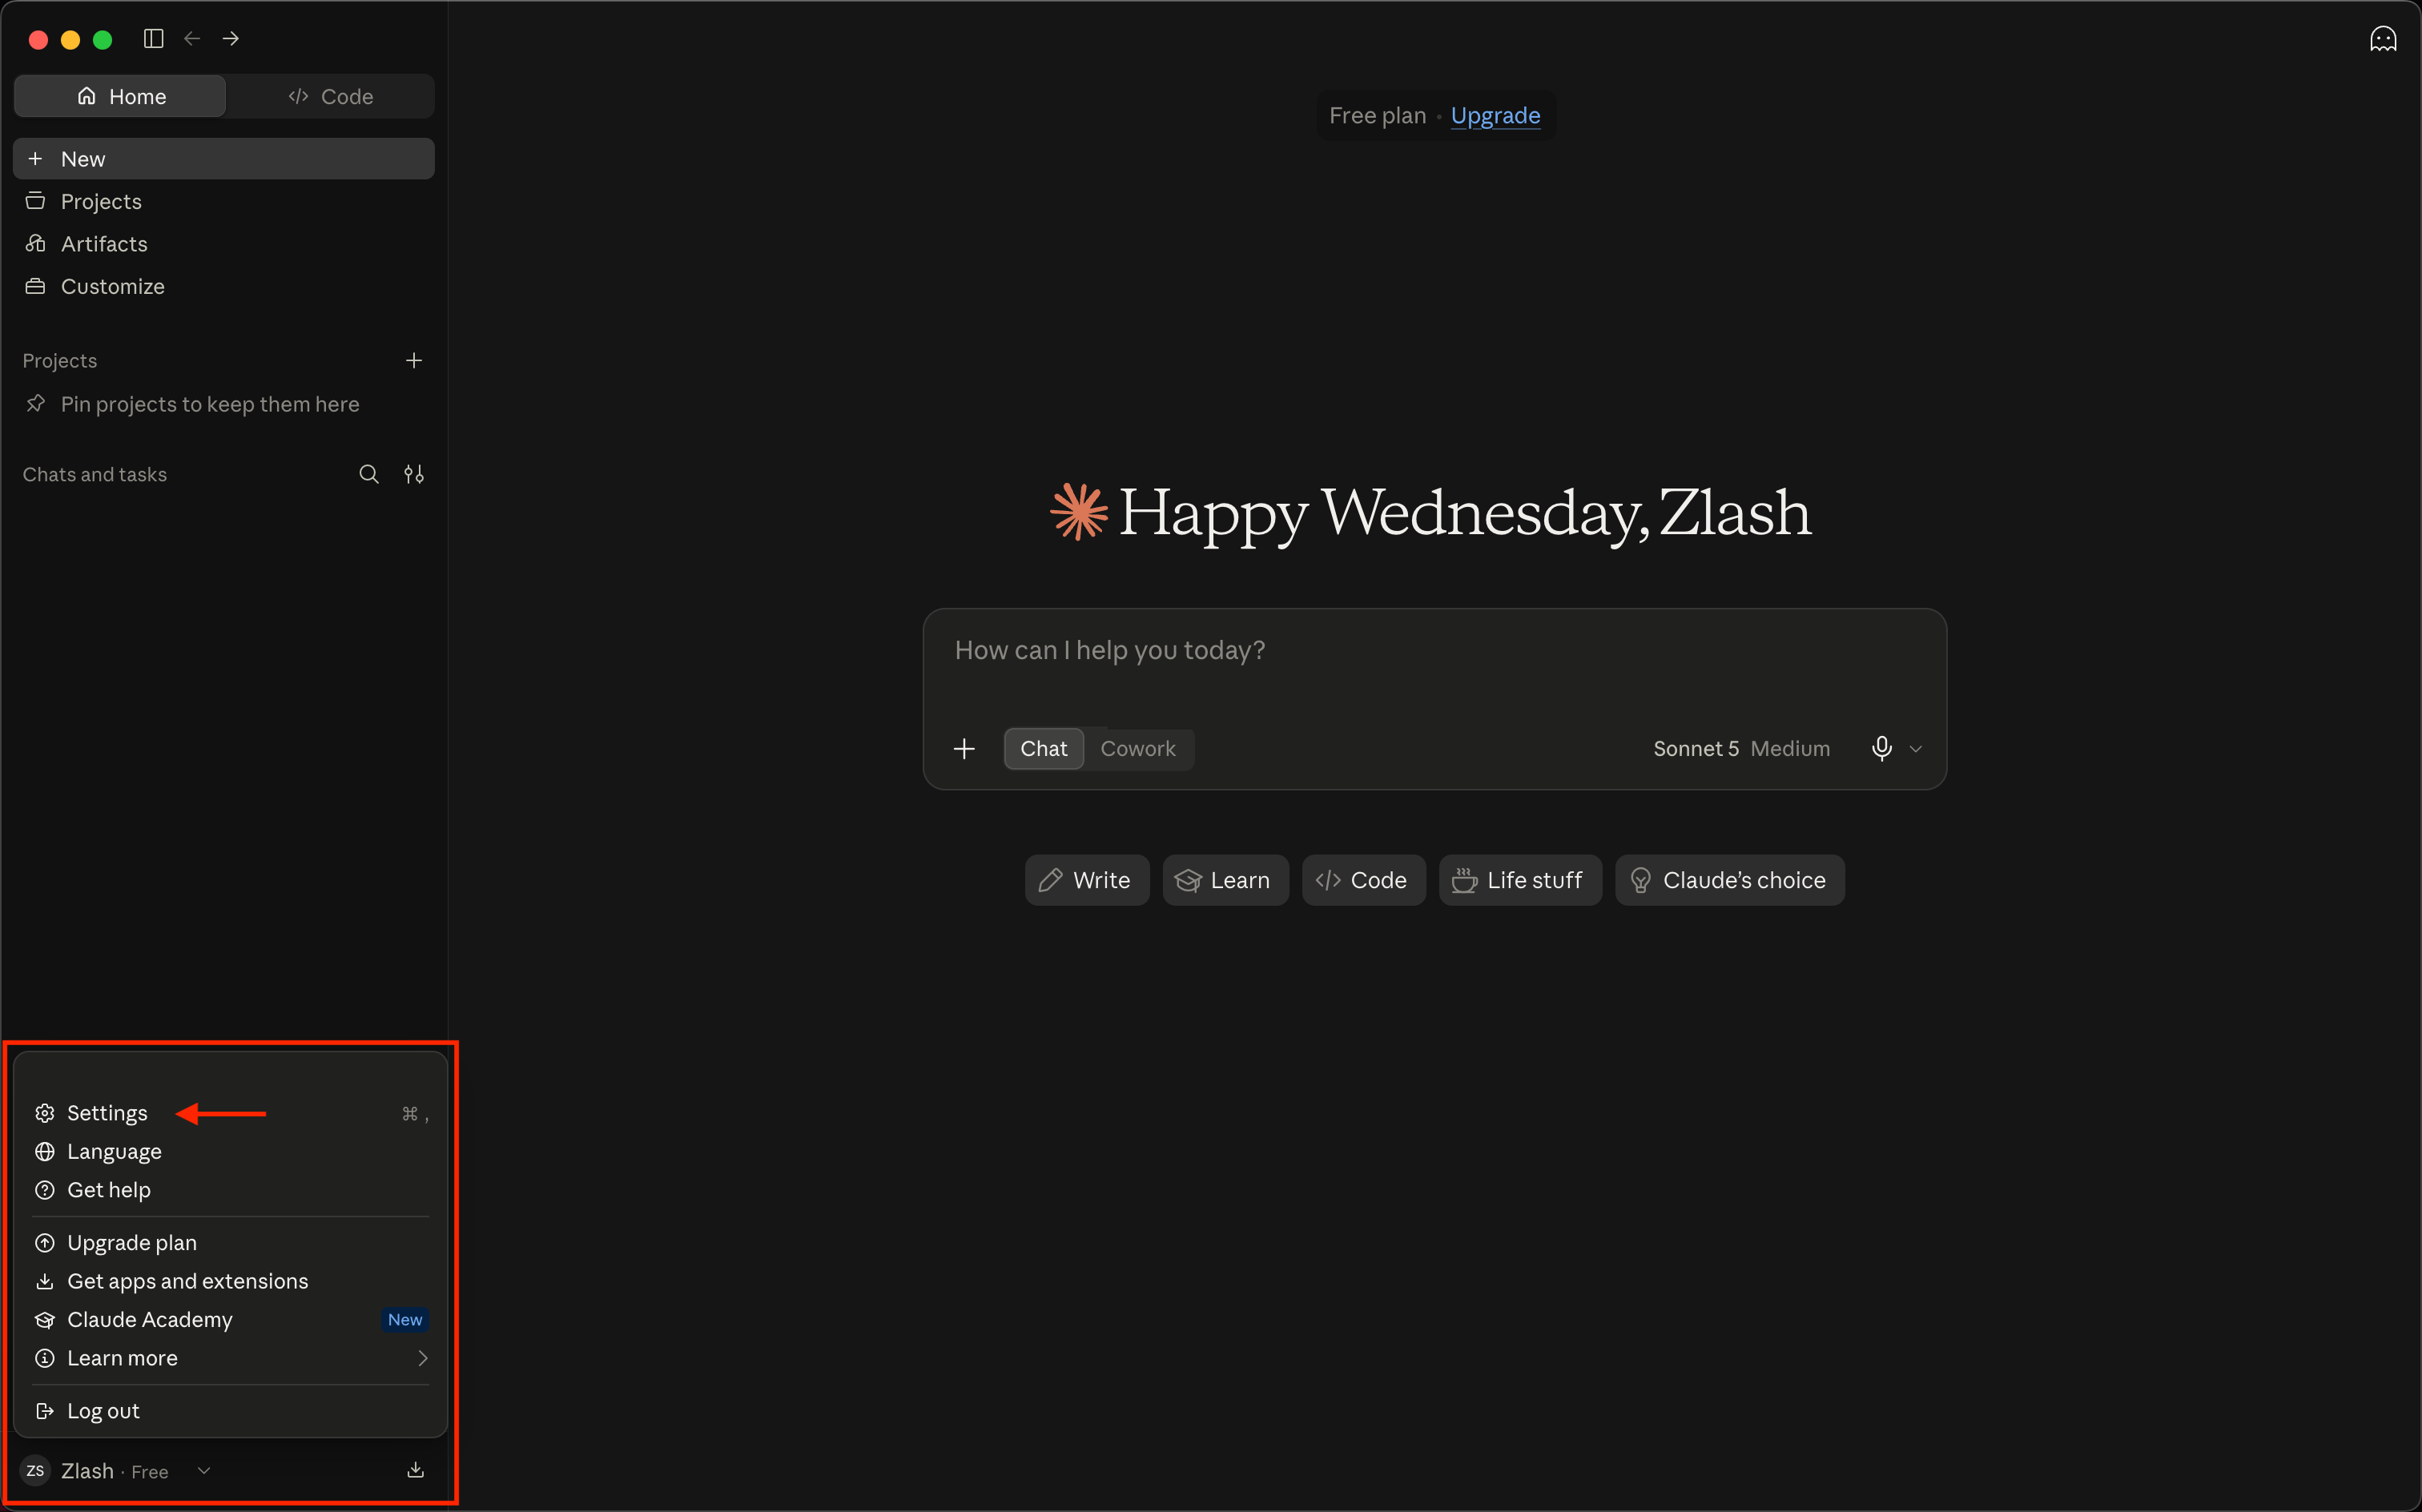
    Open Settings

    Open your profile menu in the bottom-left corner of Claude Desktop, then select Settings
    Claude Desktop profile menu open with Settings highlightedOpen full size
  2. 02

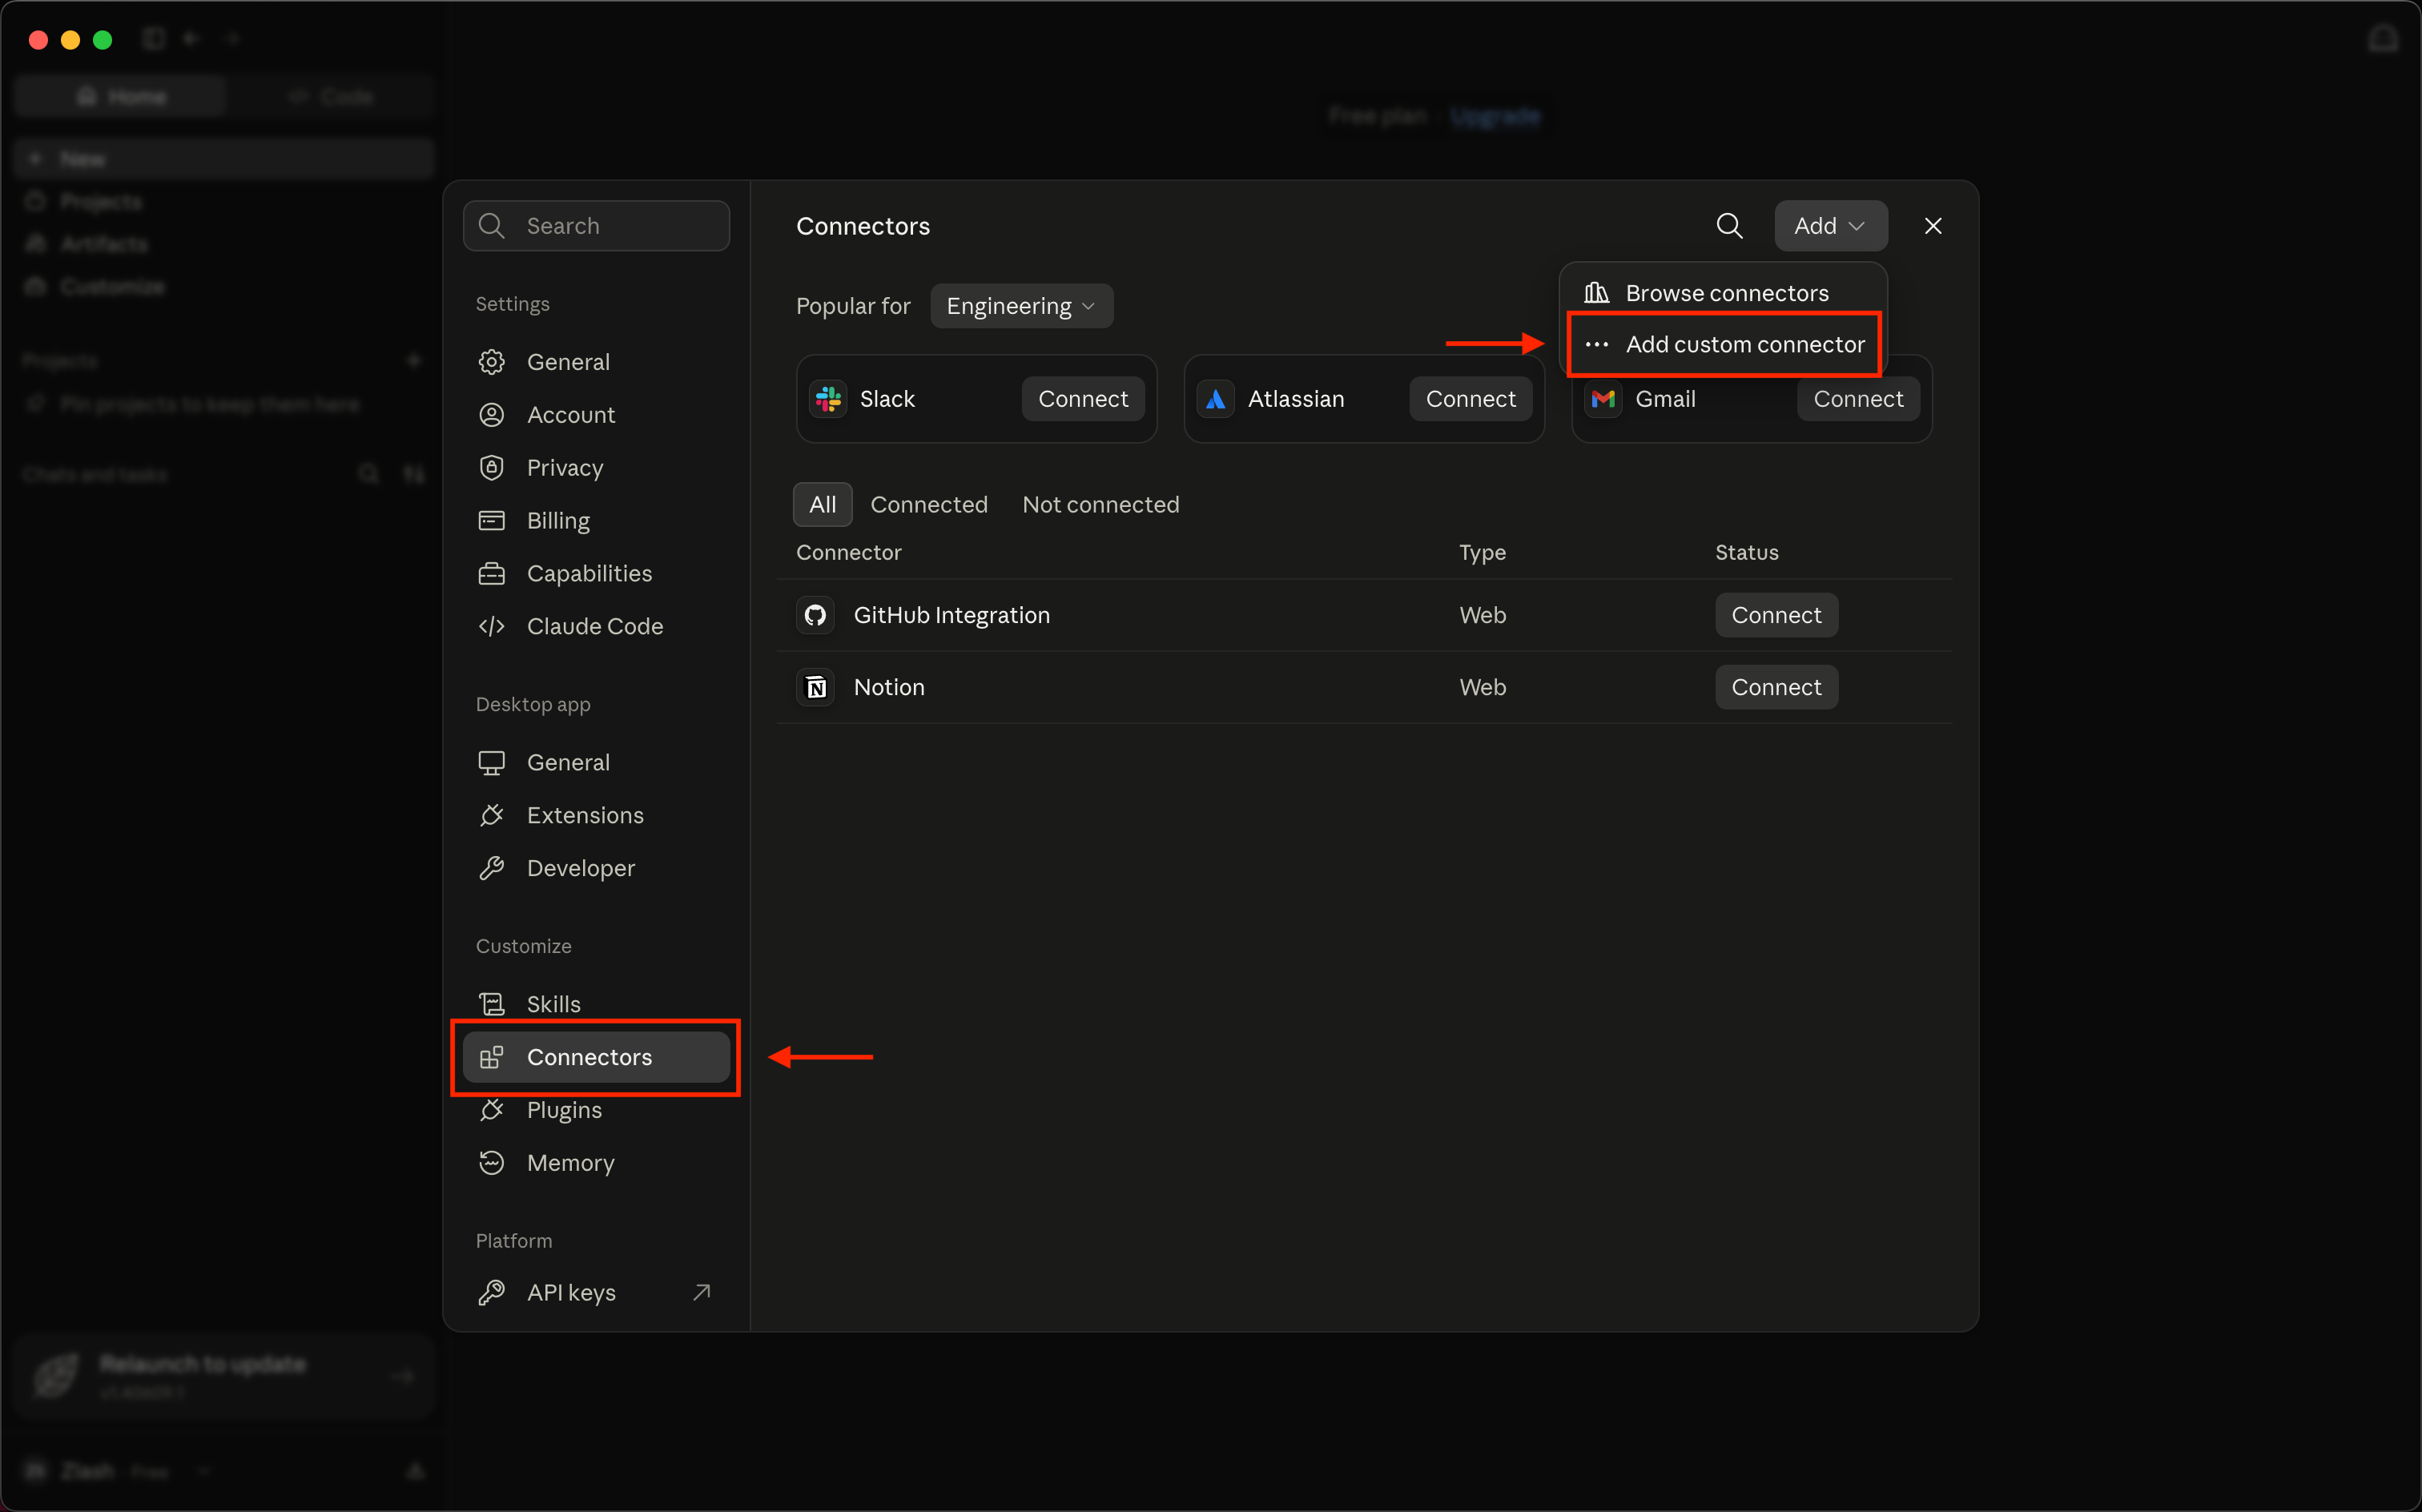
    Open custom connector setup

    Go to CustomizeConnectors, then select AddAdd custom connector
    Claude Settings with Connectors selected and Add custom connector highlightedOpen full size
  3. 03

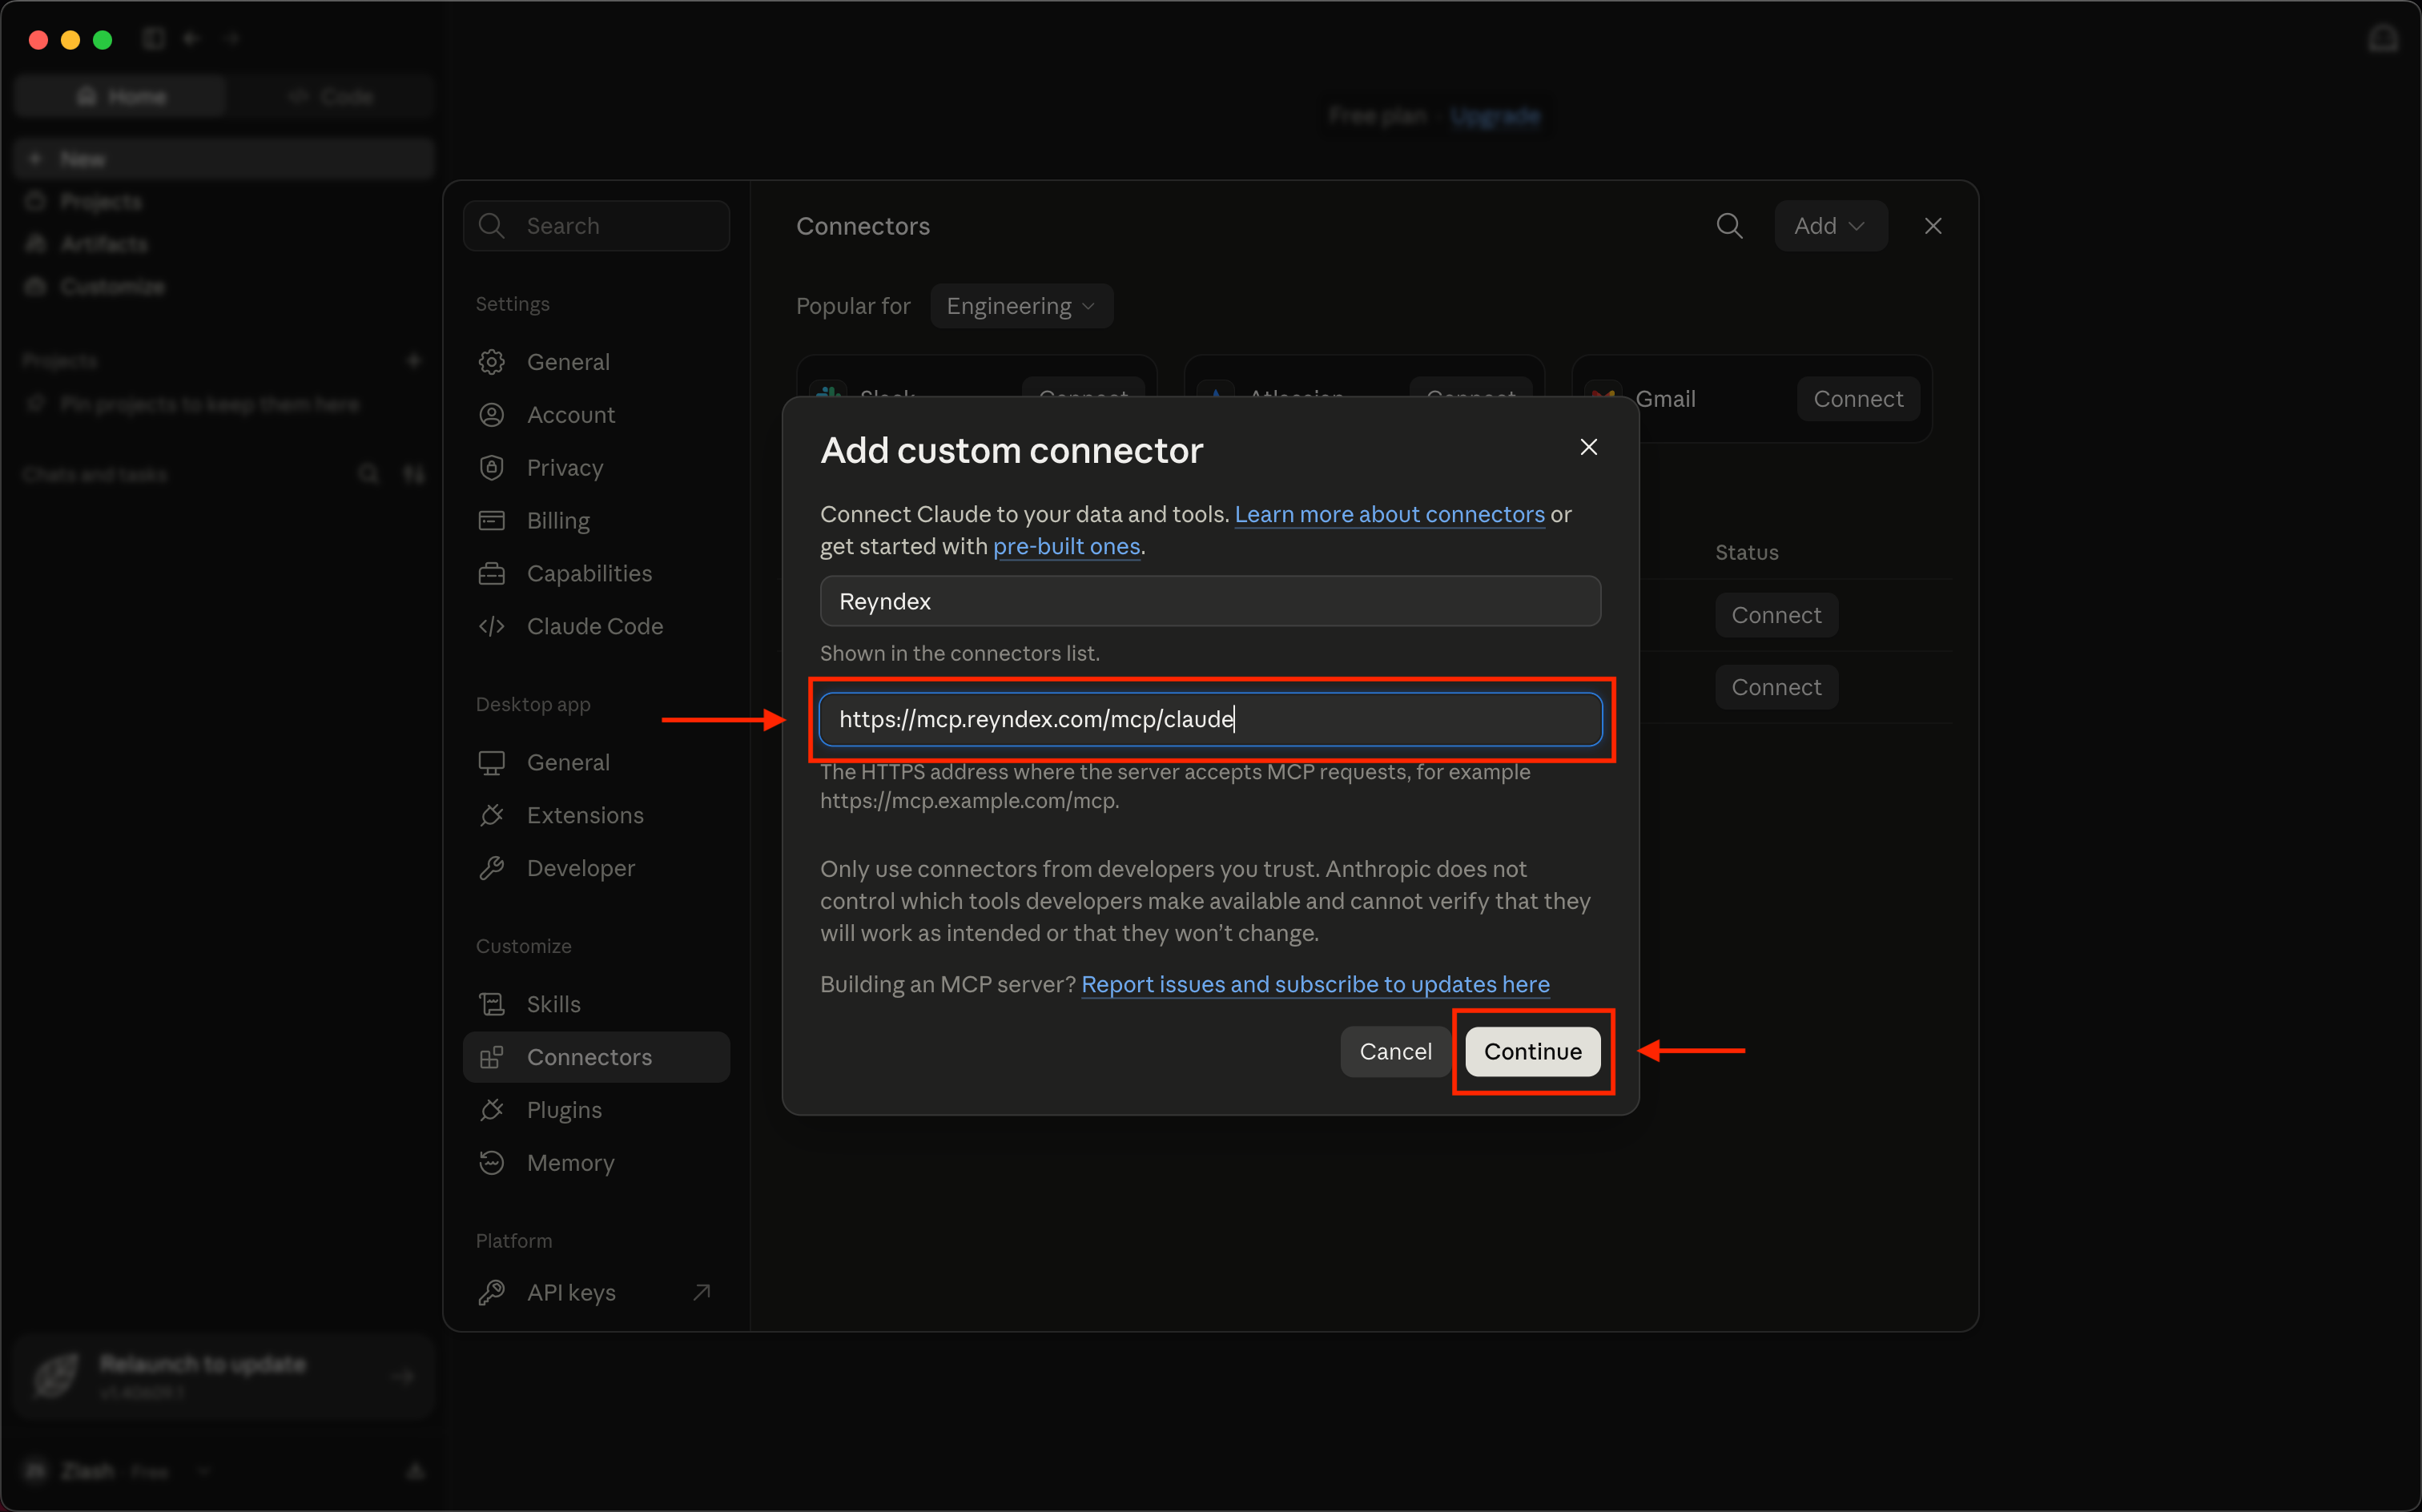
    Enter the connection URL

    Enter Reyndex as the name, paste the connection URL, then select Continue
    Claude Add custom connector dialog with the Reyndex endpoint and Continue button highlightedOpen full size
  4. 04

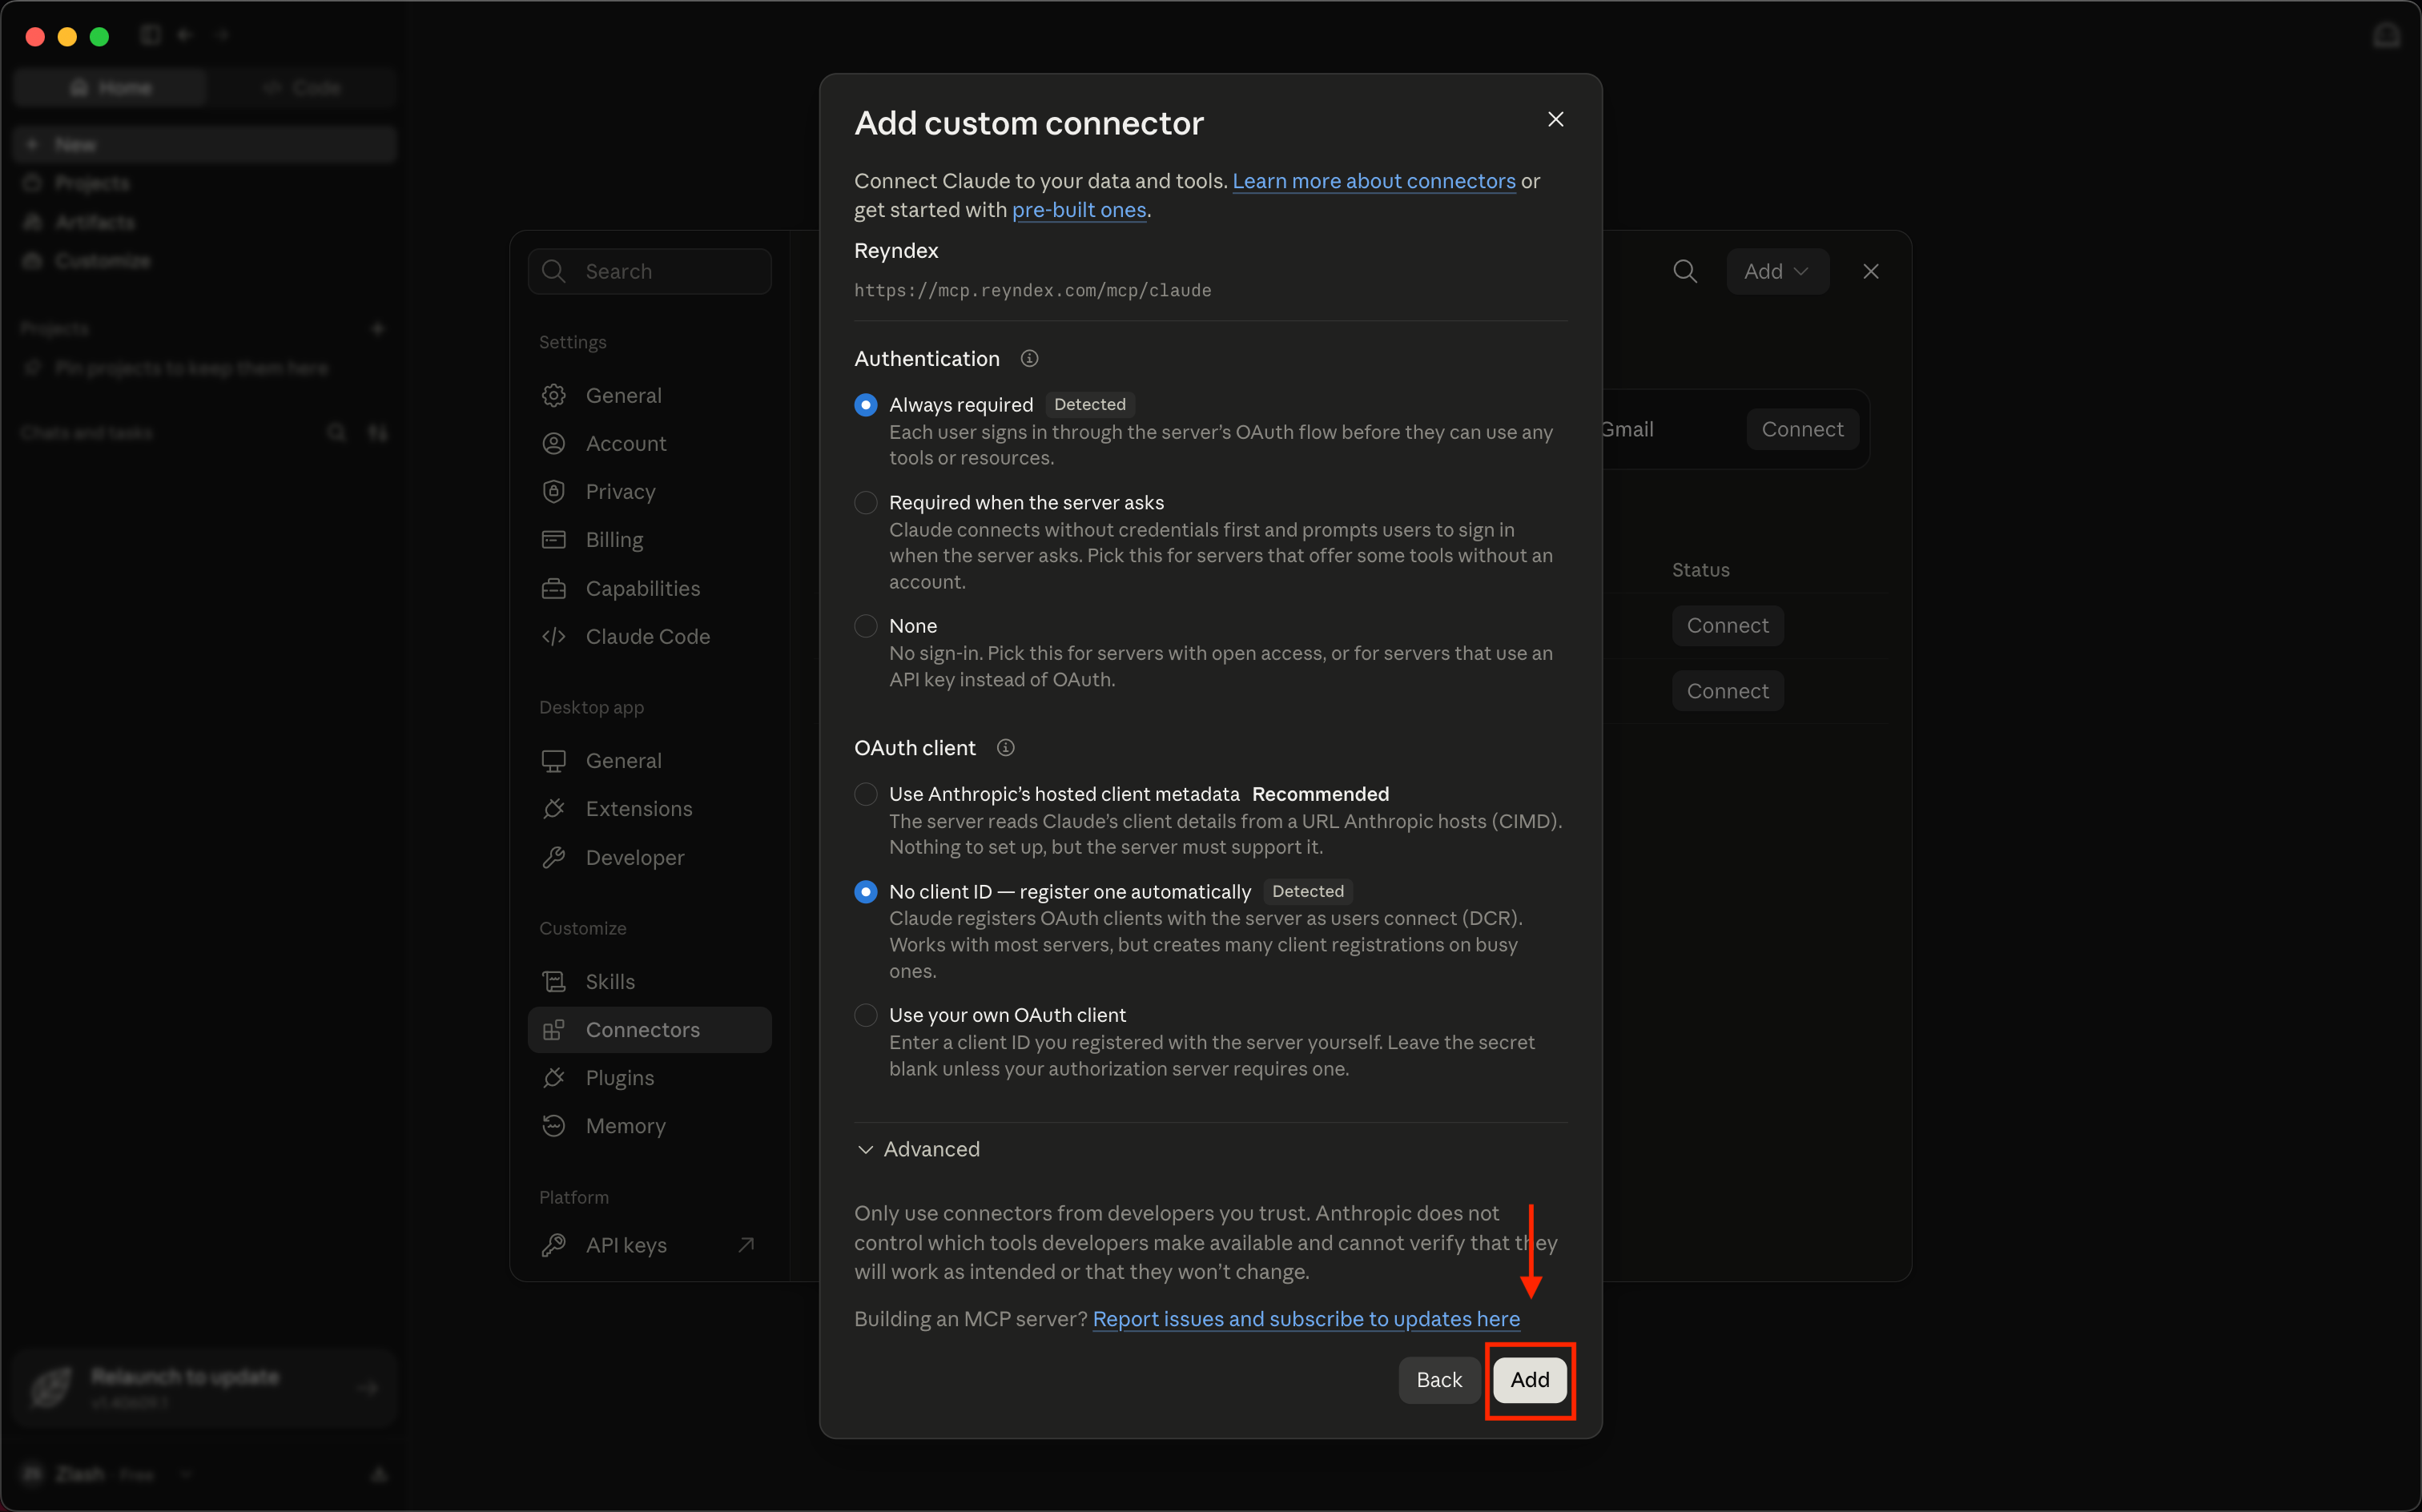
    Confirm authentication settings

    Leave the detected authentication settings as they are, then select Add
    Claude connector authentication settings showing Always required and automatic client registration with the Add button highlightedOpen full size
  5. 05

    Connect Reyndex

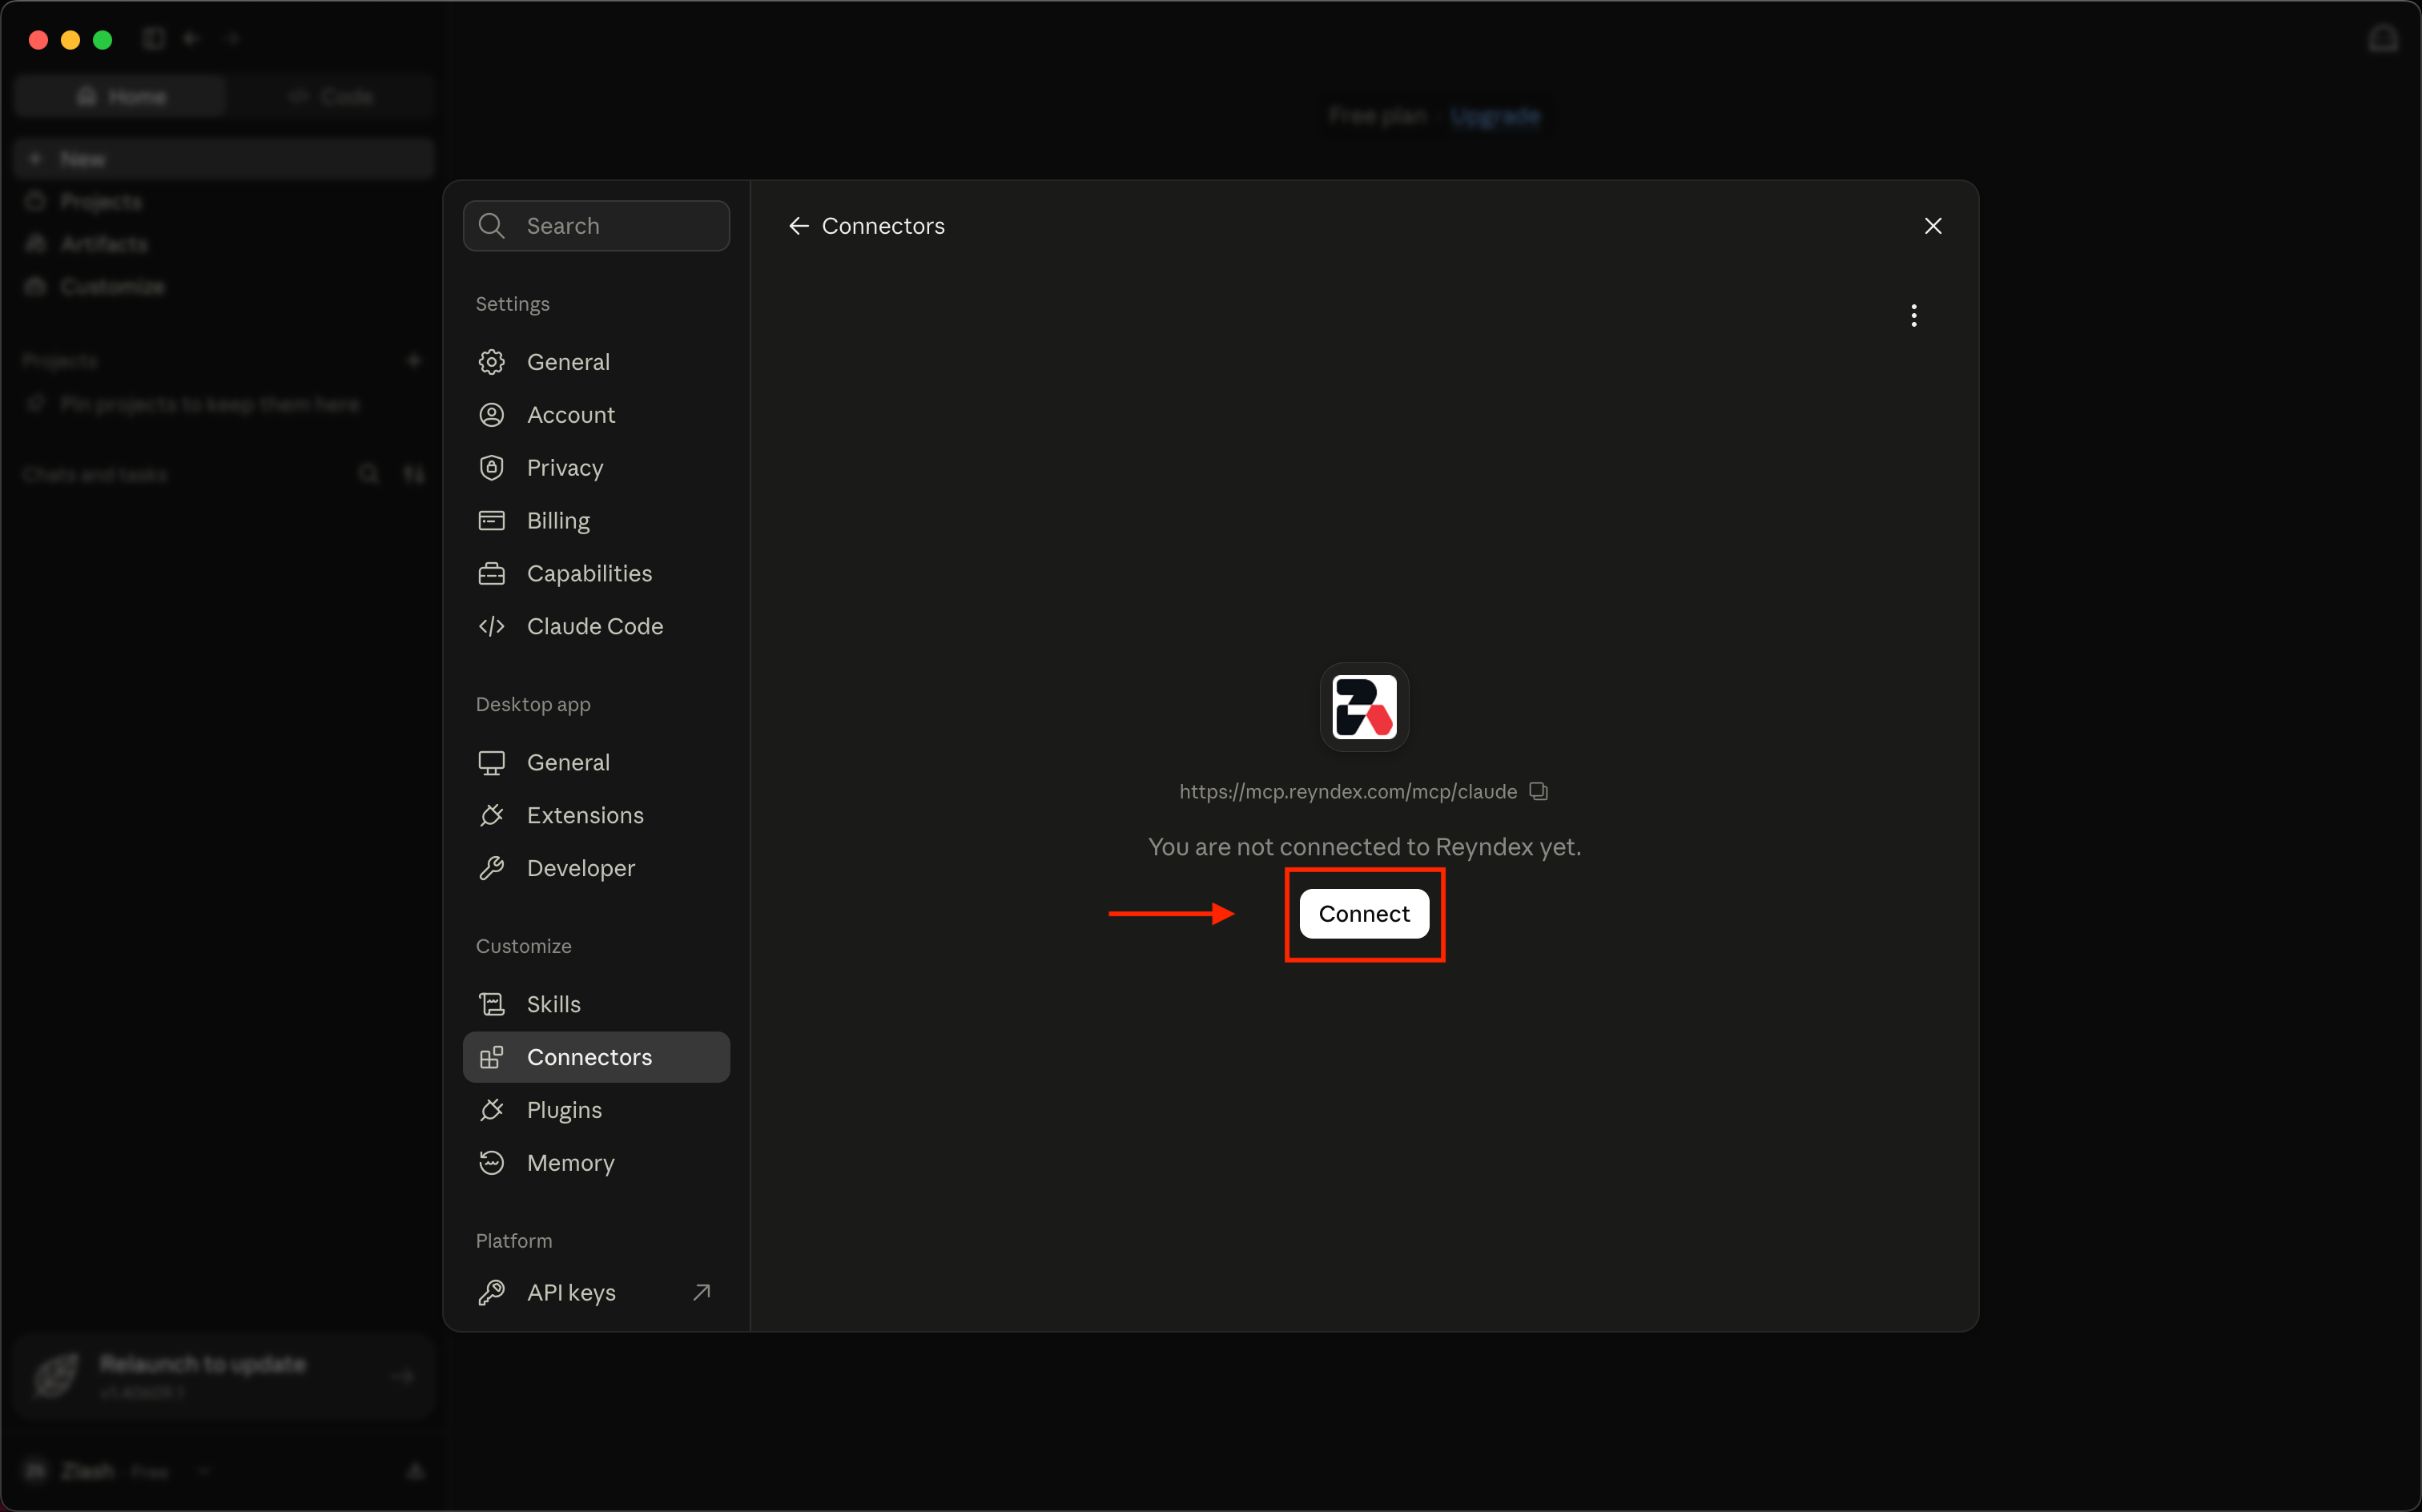
    On the Reyndex connector page, select Connect
    Claude Reyndex connector page with the Connect button highlightedOpen full size
  6. 06

    Approve read-only access

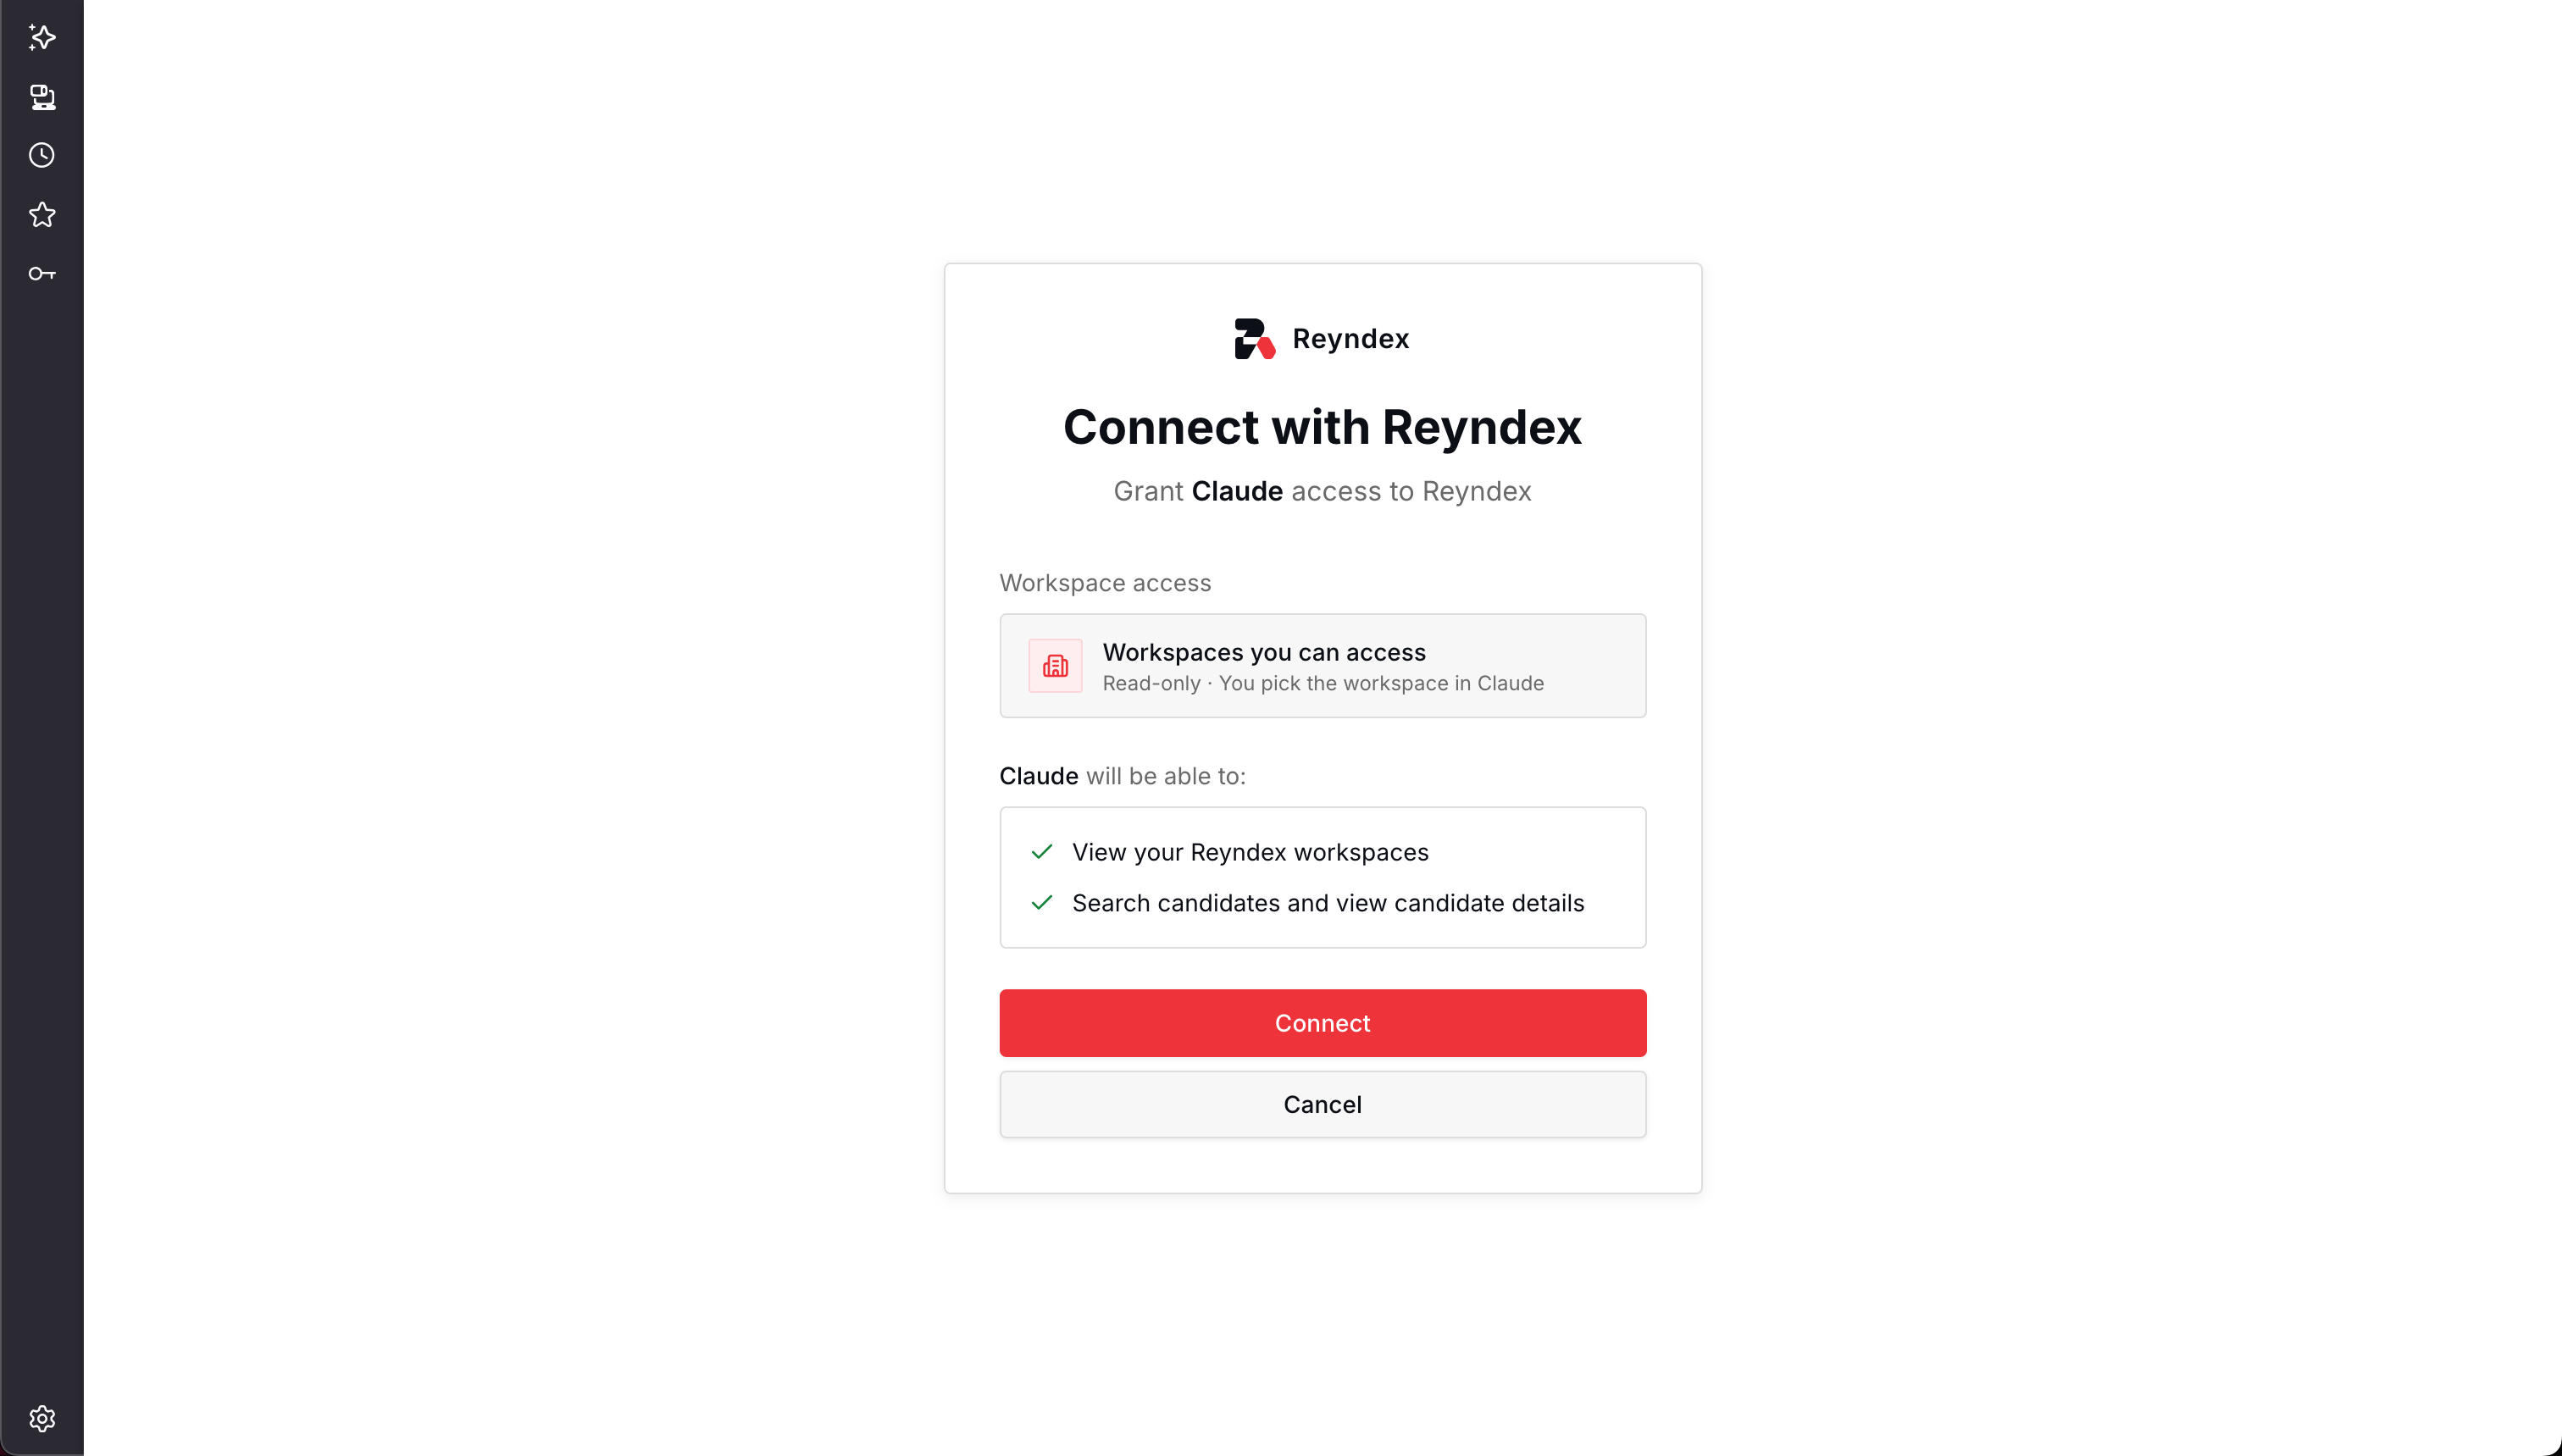
    Review the Reyndex consent screen, then select Connect to grant Claude read-only workspace and candidate access
    Reyndex consent screen showing read-only Claude workspace and candidate permissions with Connect highlightedOpen full size
  7. 07

    Review tool permissions

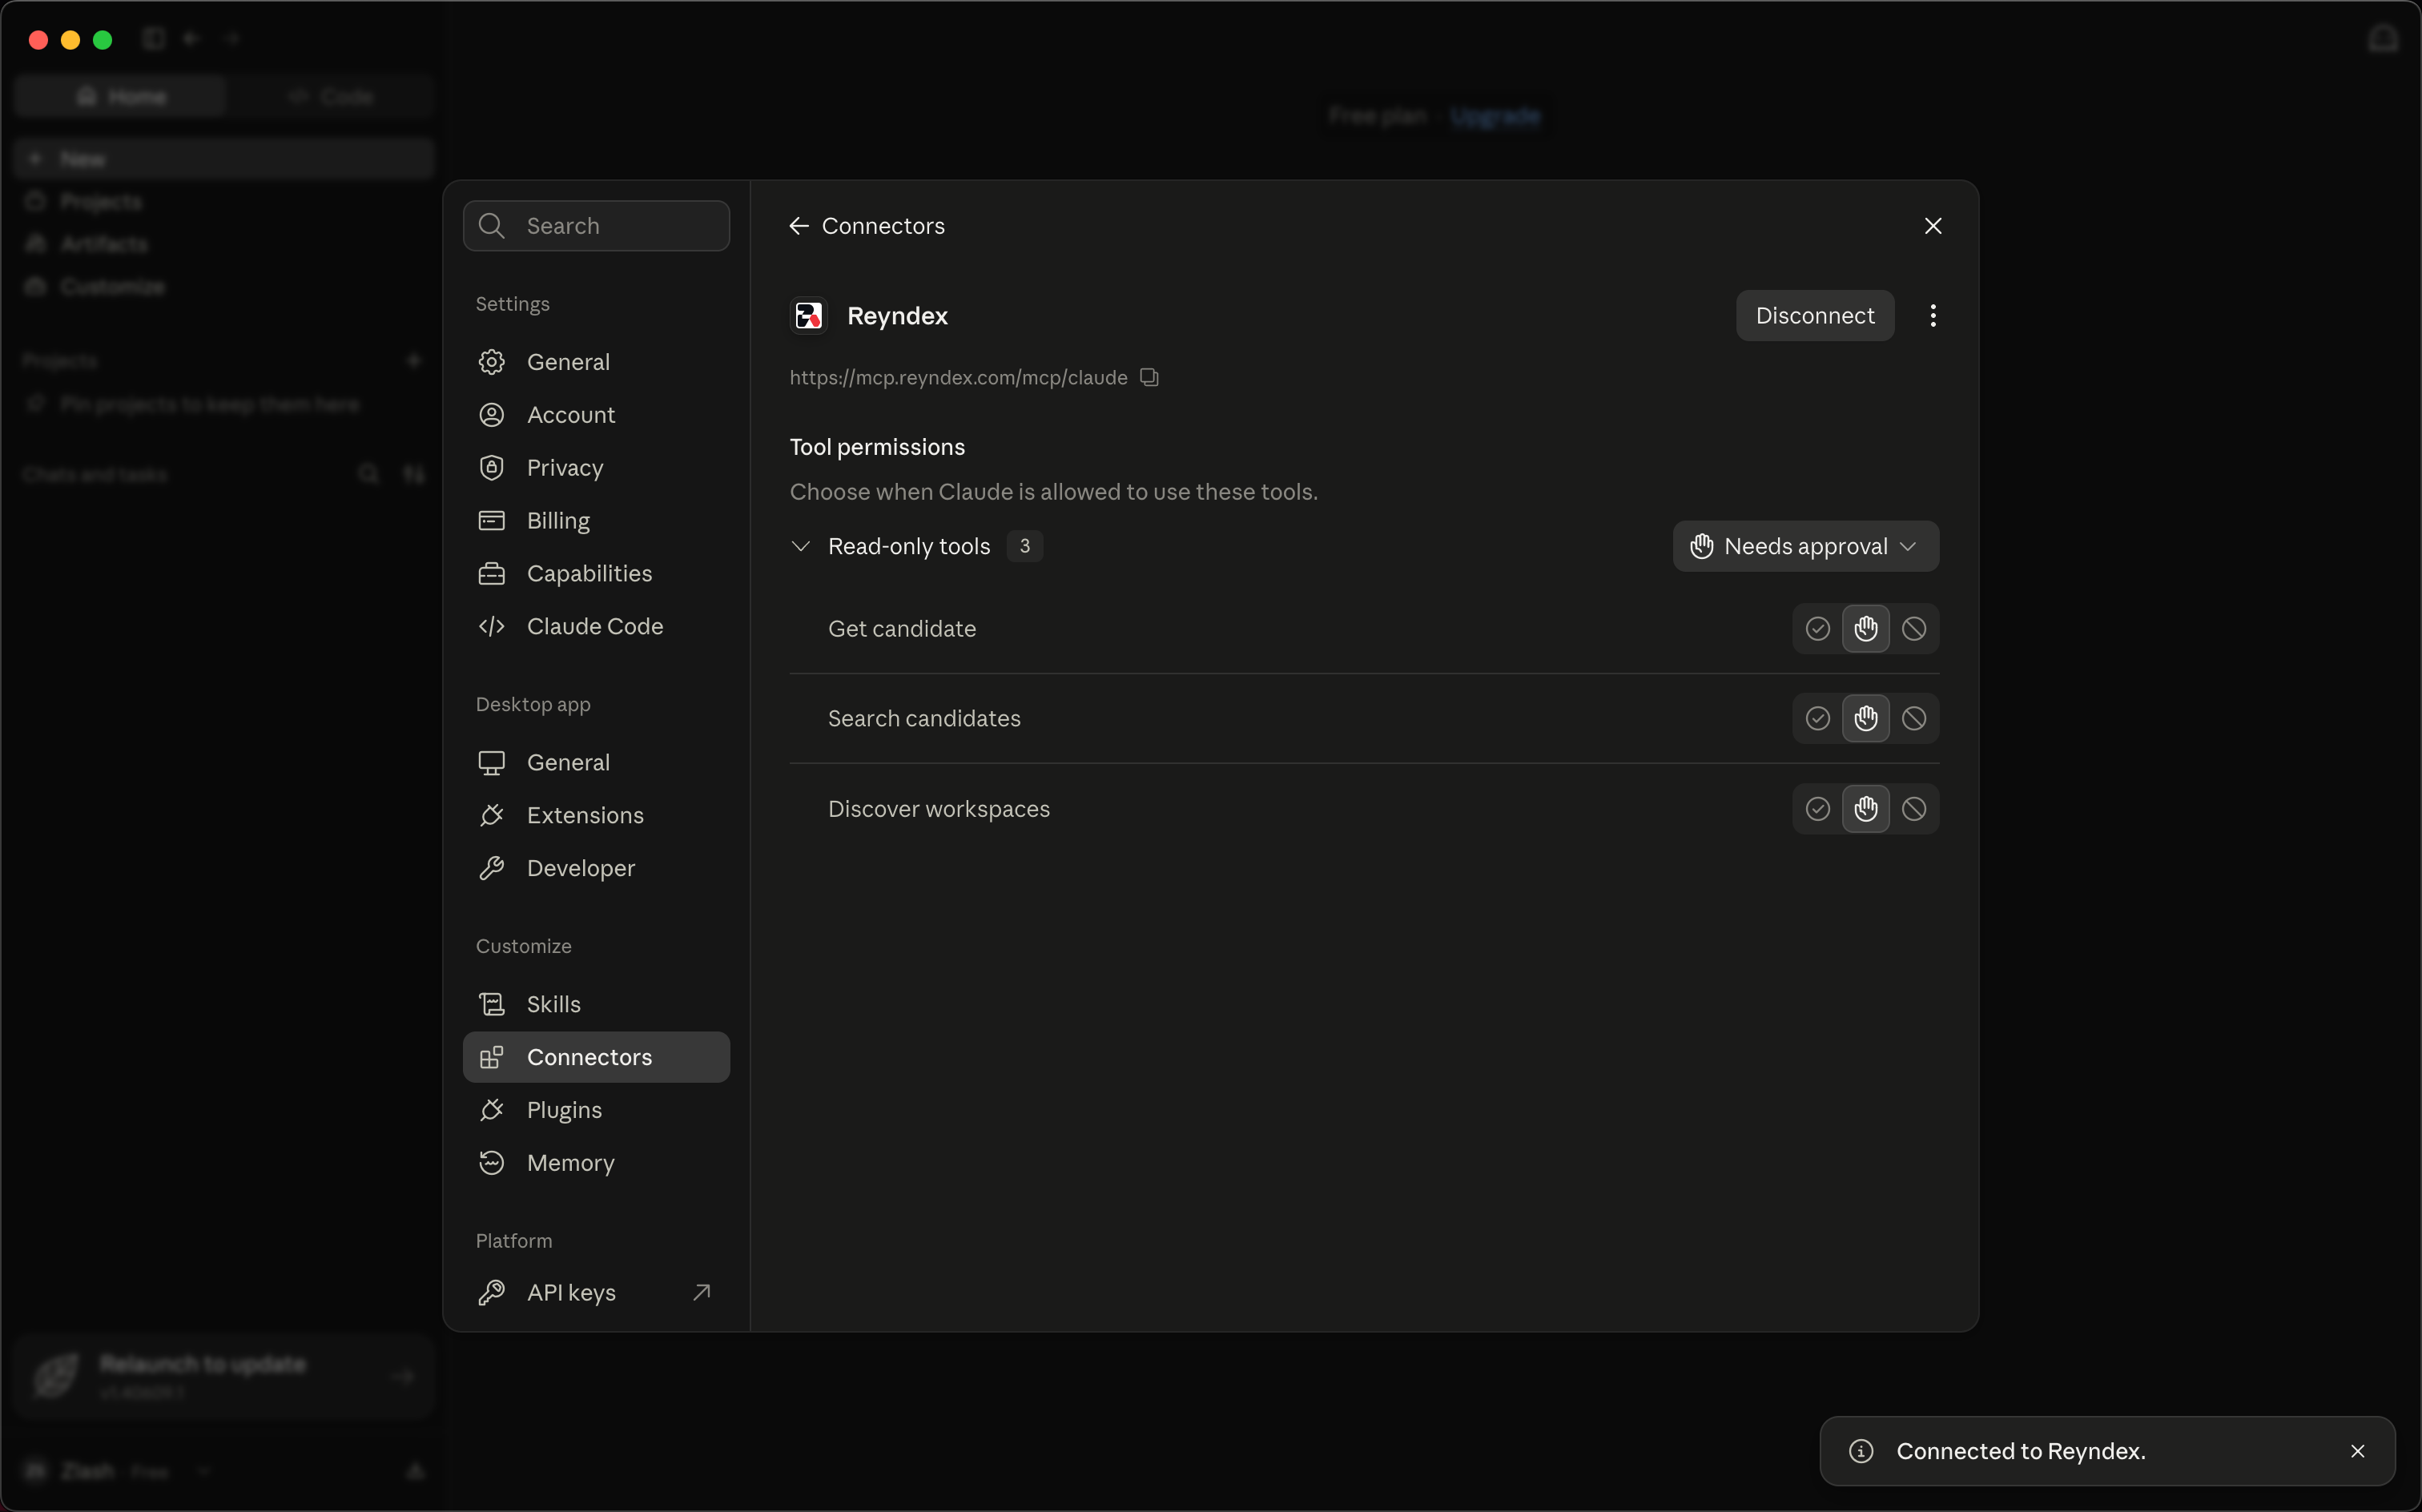
    Review the Reyndex tool permissions and adjust them as needed
    Claude Reyndex connector settings showing three read-only tools and Needs approval permissionsOpen full size

Team and Enterprise setup

An organization owner adds Reyndex once, then each member connects their own account

  1. 01

    Owner: Open Organization settings

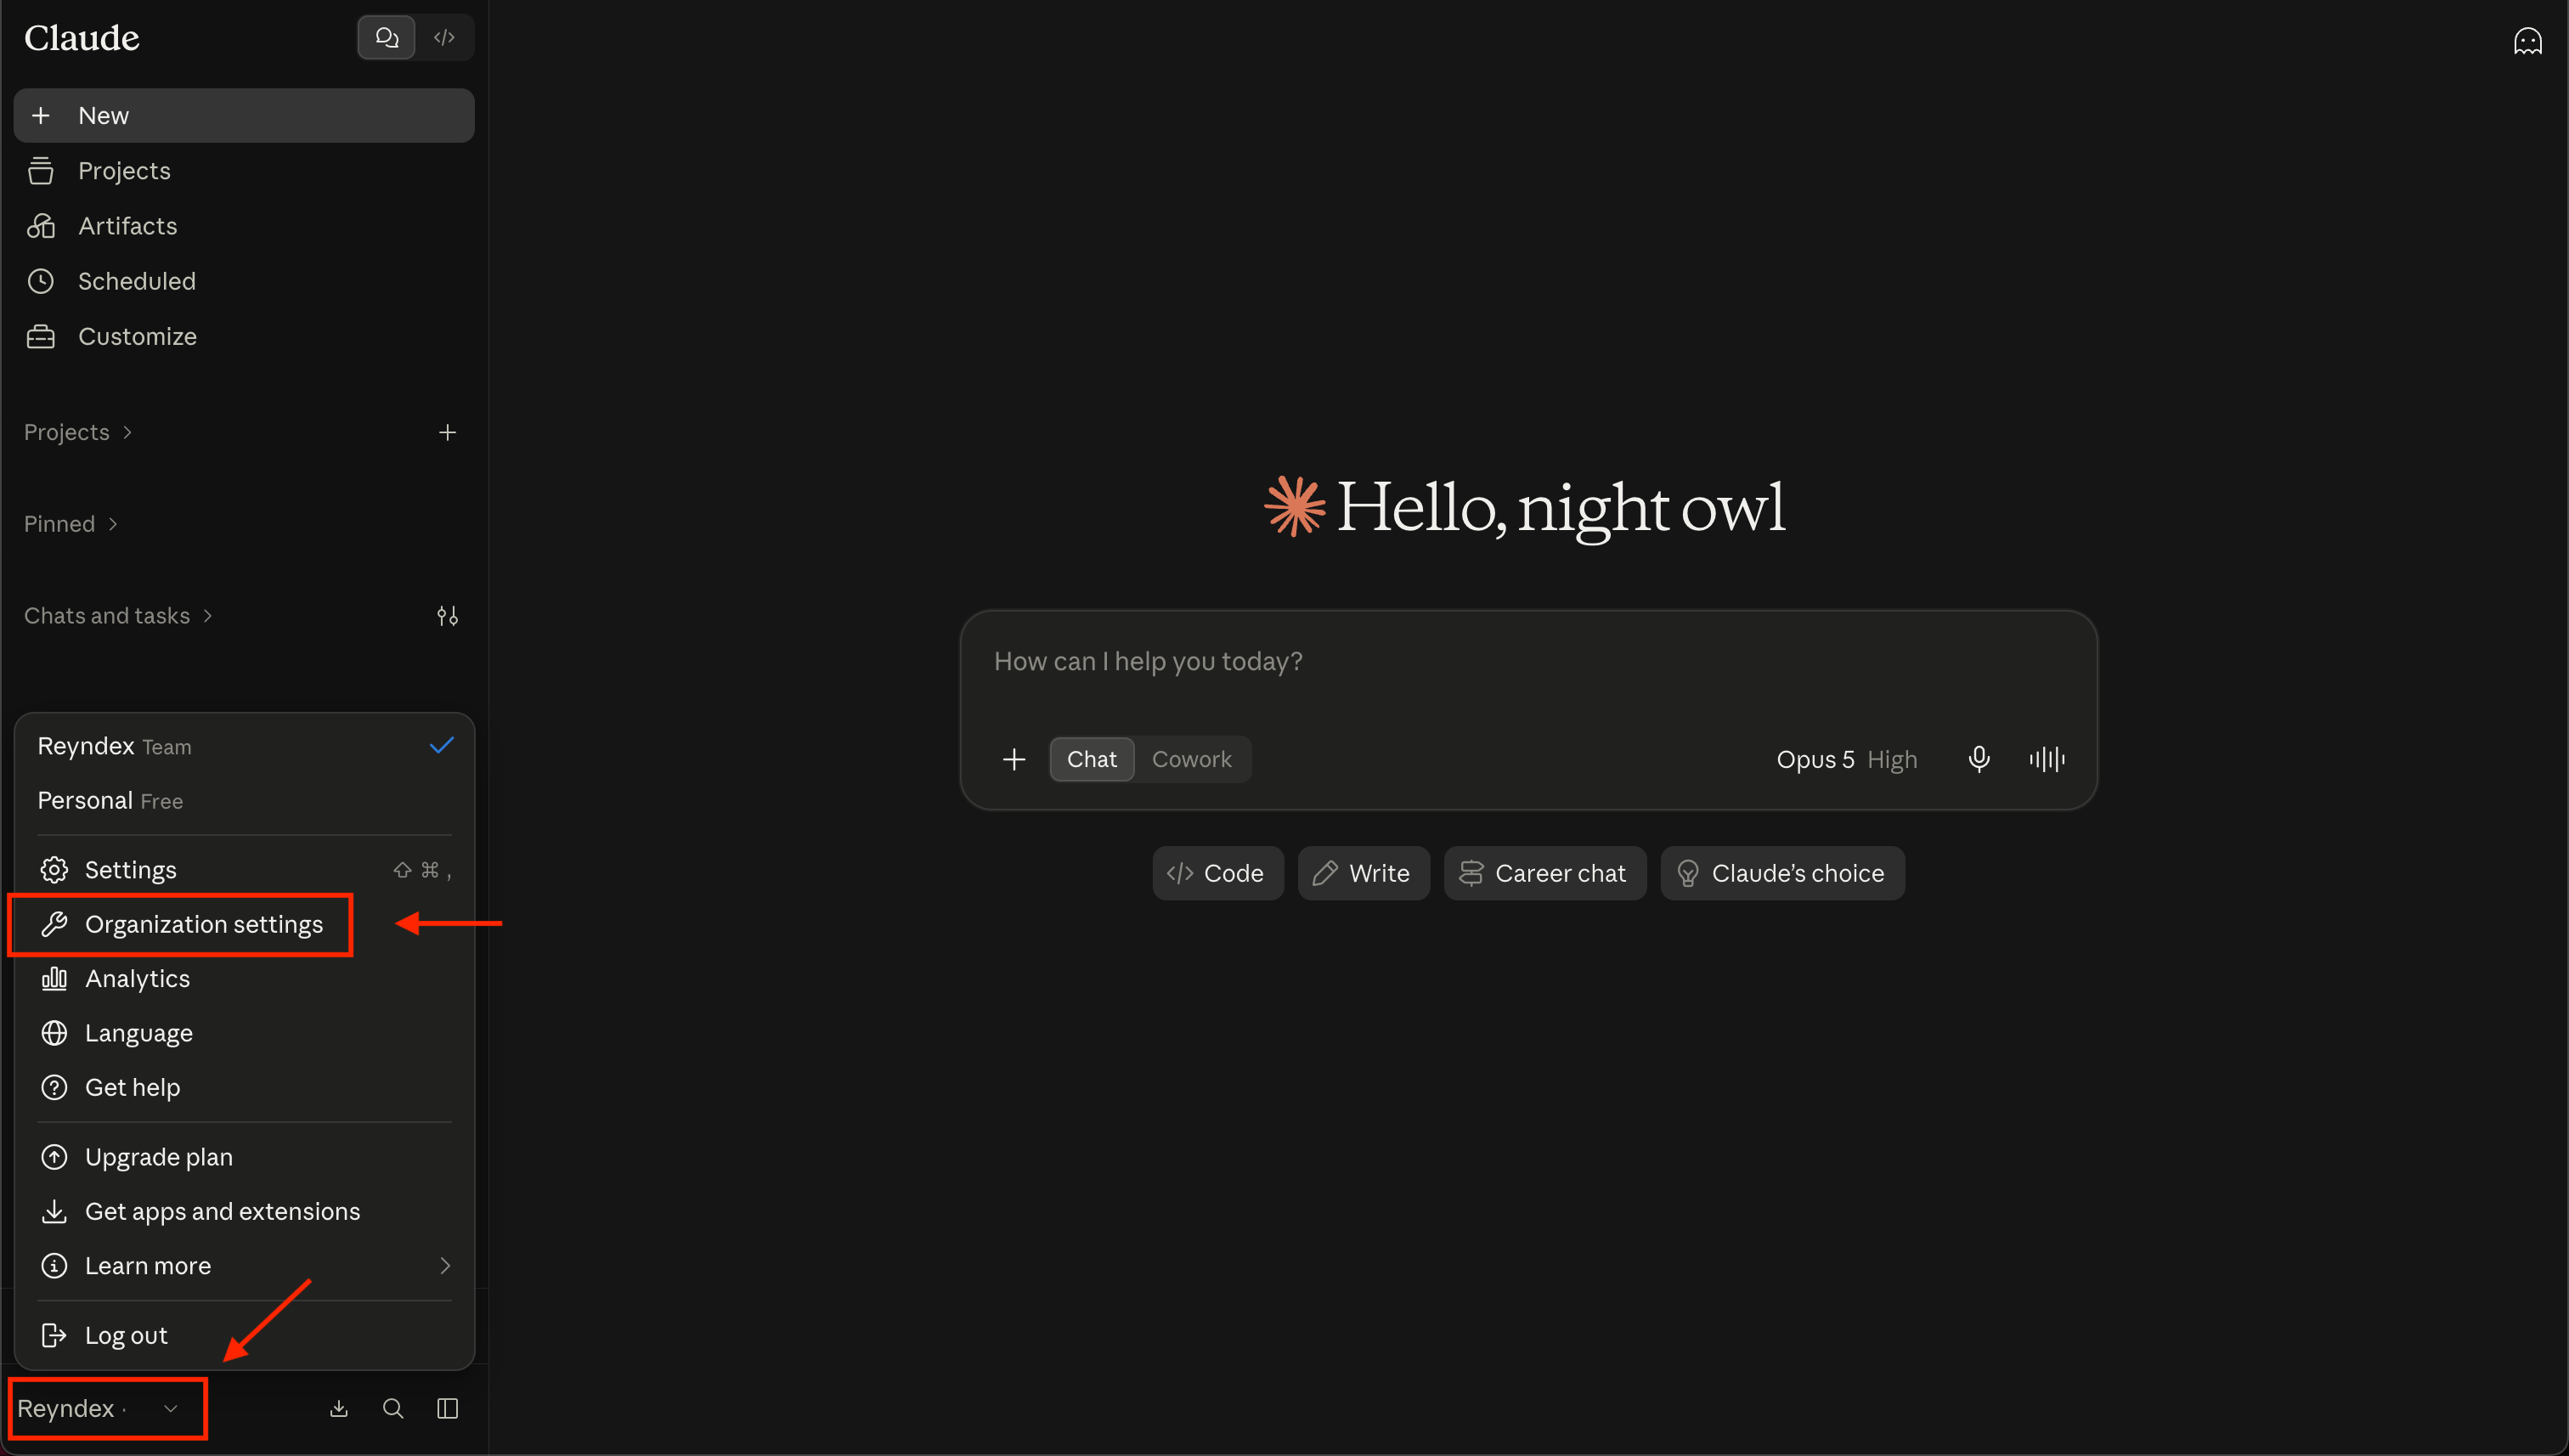
    In Claude on the web, open the menu in the bottom-left corner, then select Organization settings
    Claude organization menu open with Organization settings highlightedOpen full size
  2. 02

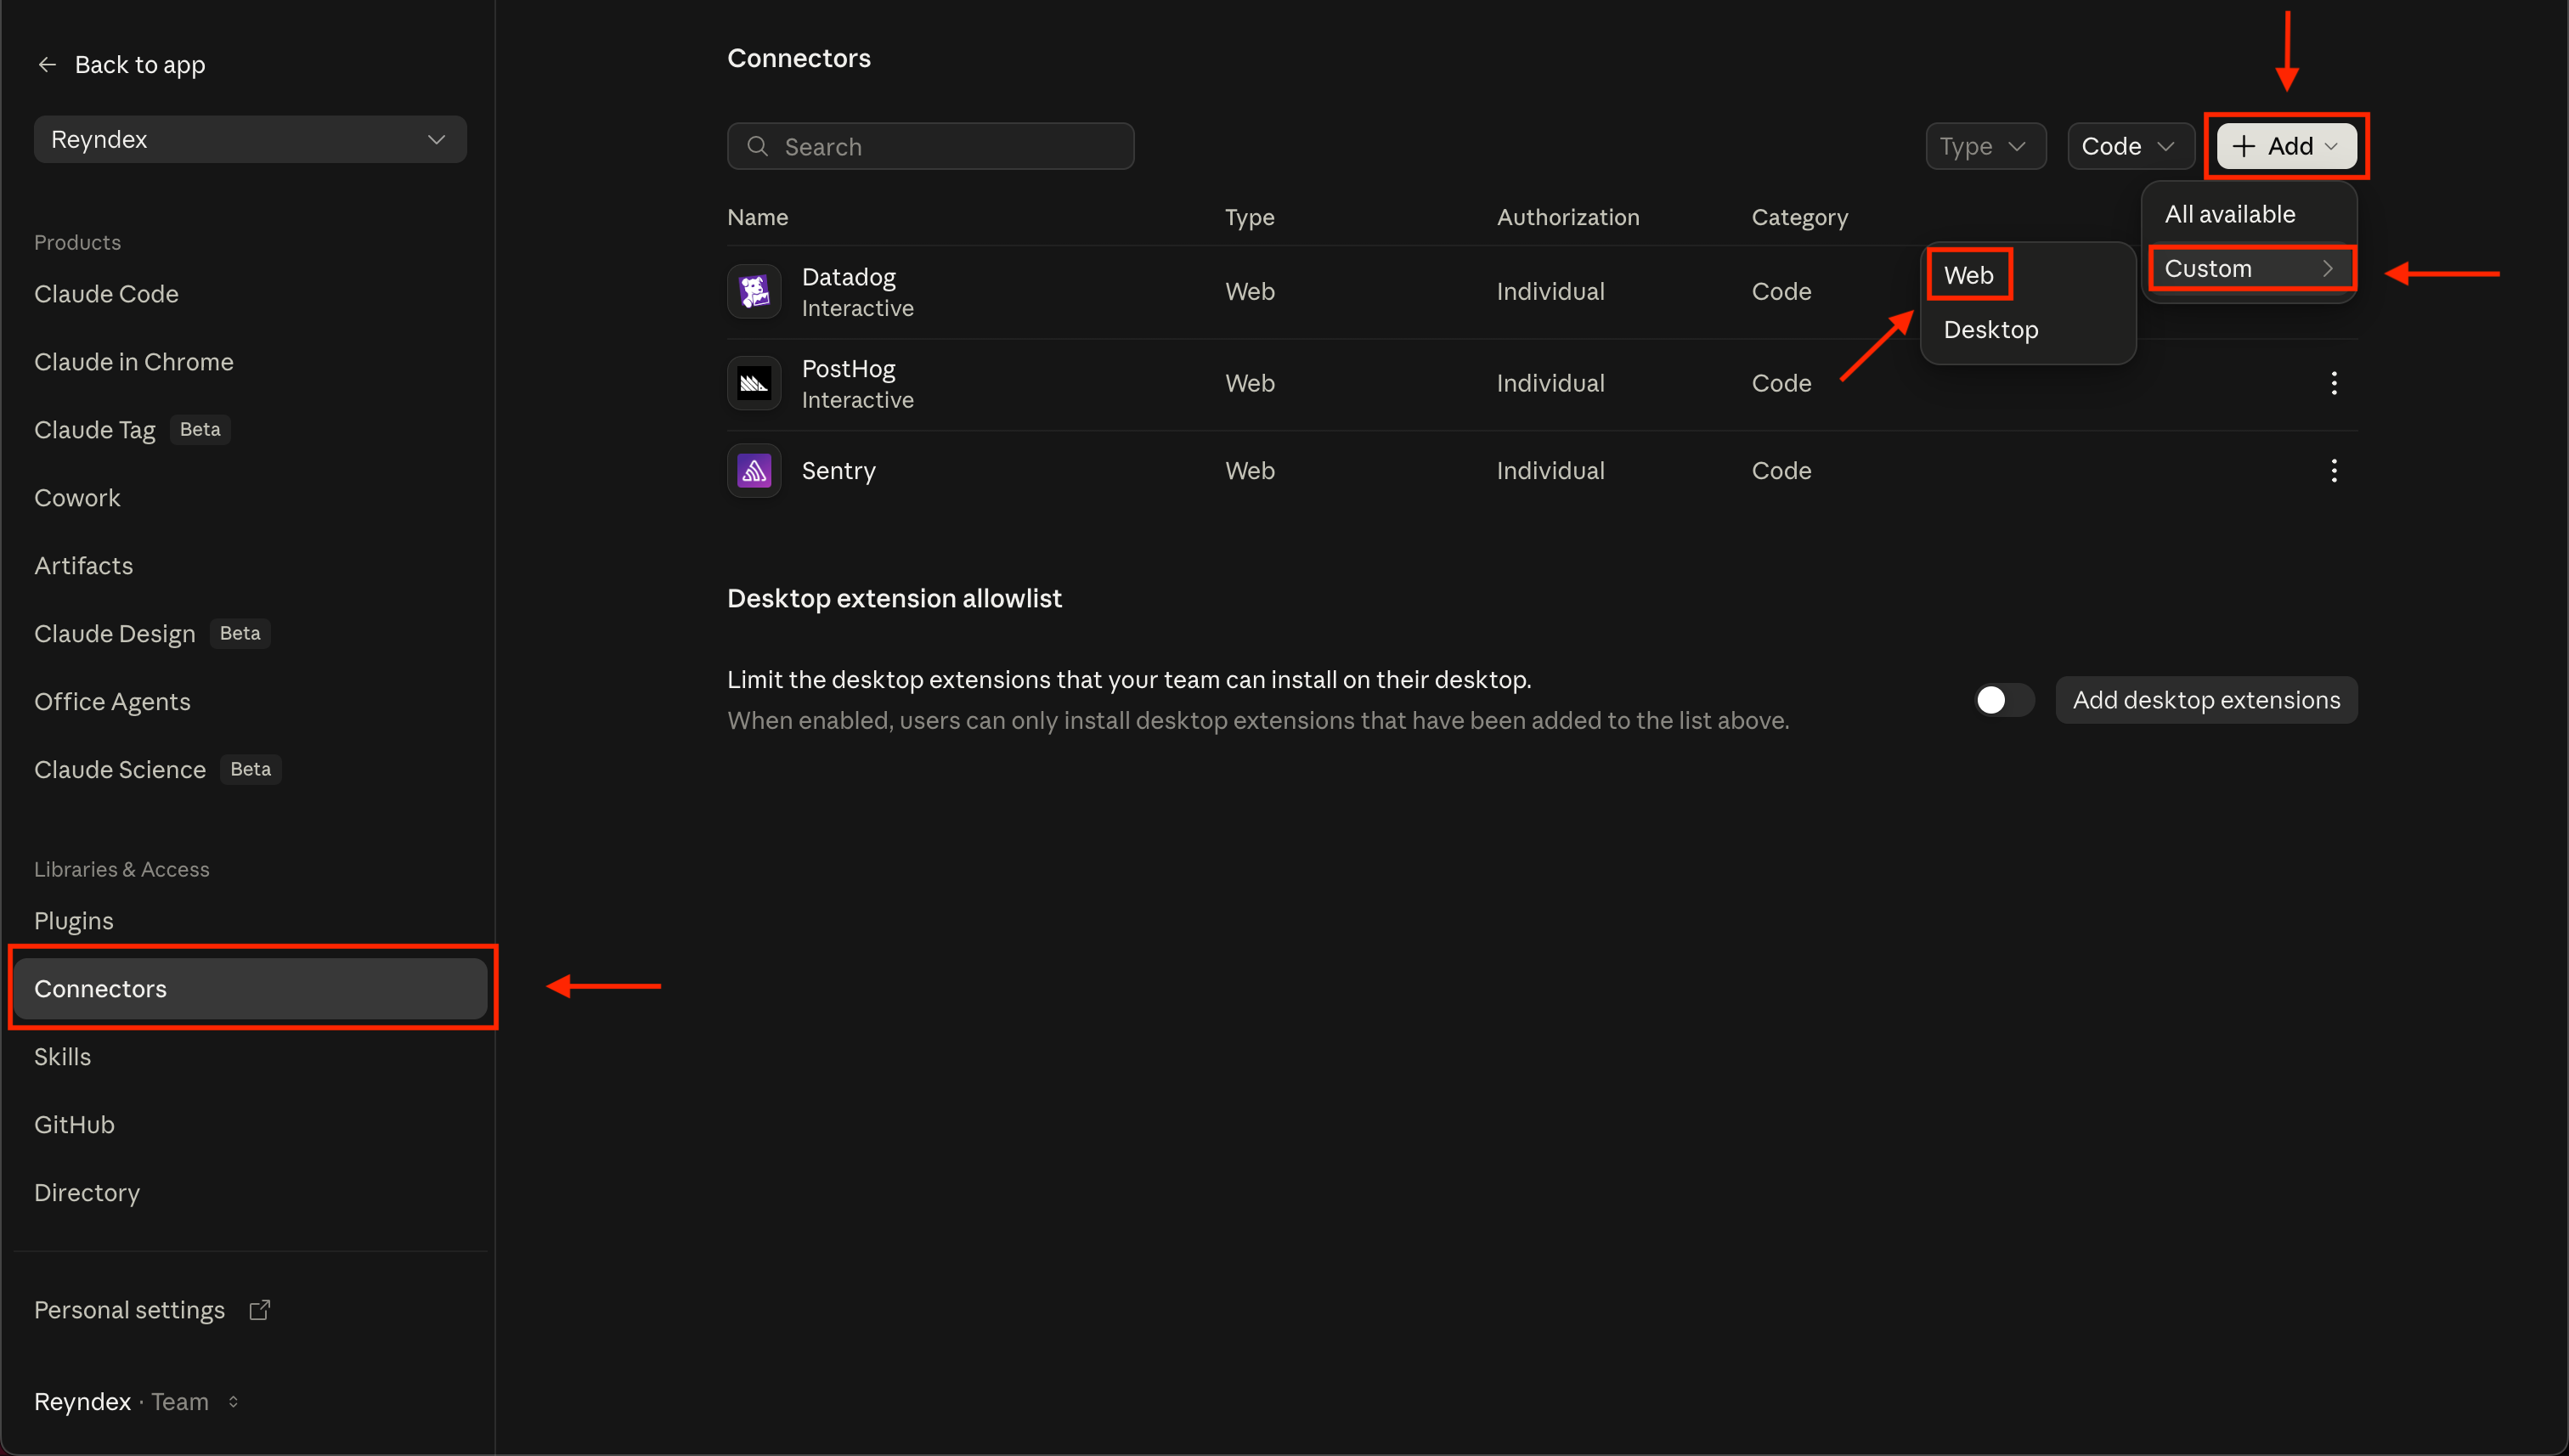
    Owner: Add a custom connector

    Go to Connectors, then select AddCustom Web
    Claude organization Connectors page with Add, Custom, and Web highlightedOpen full size
  3. 03

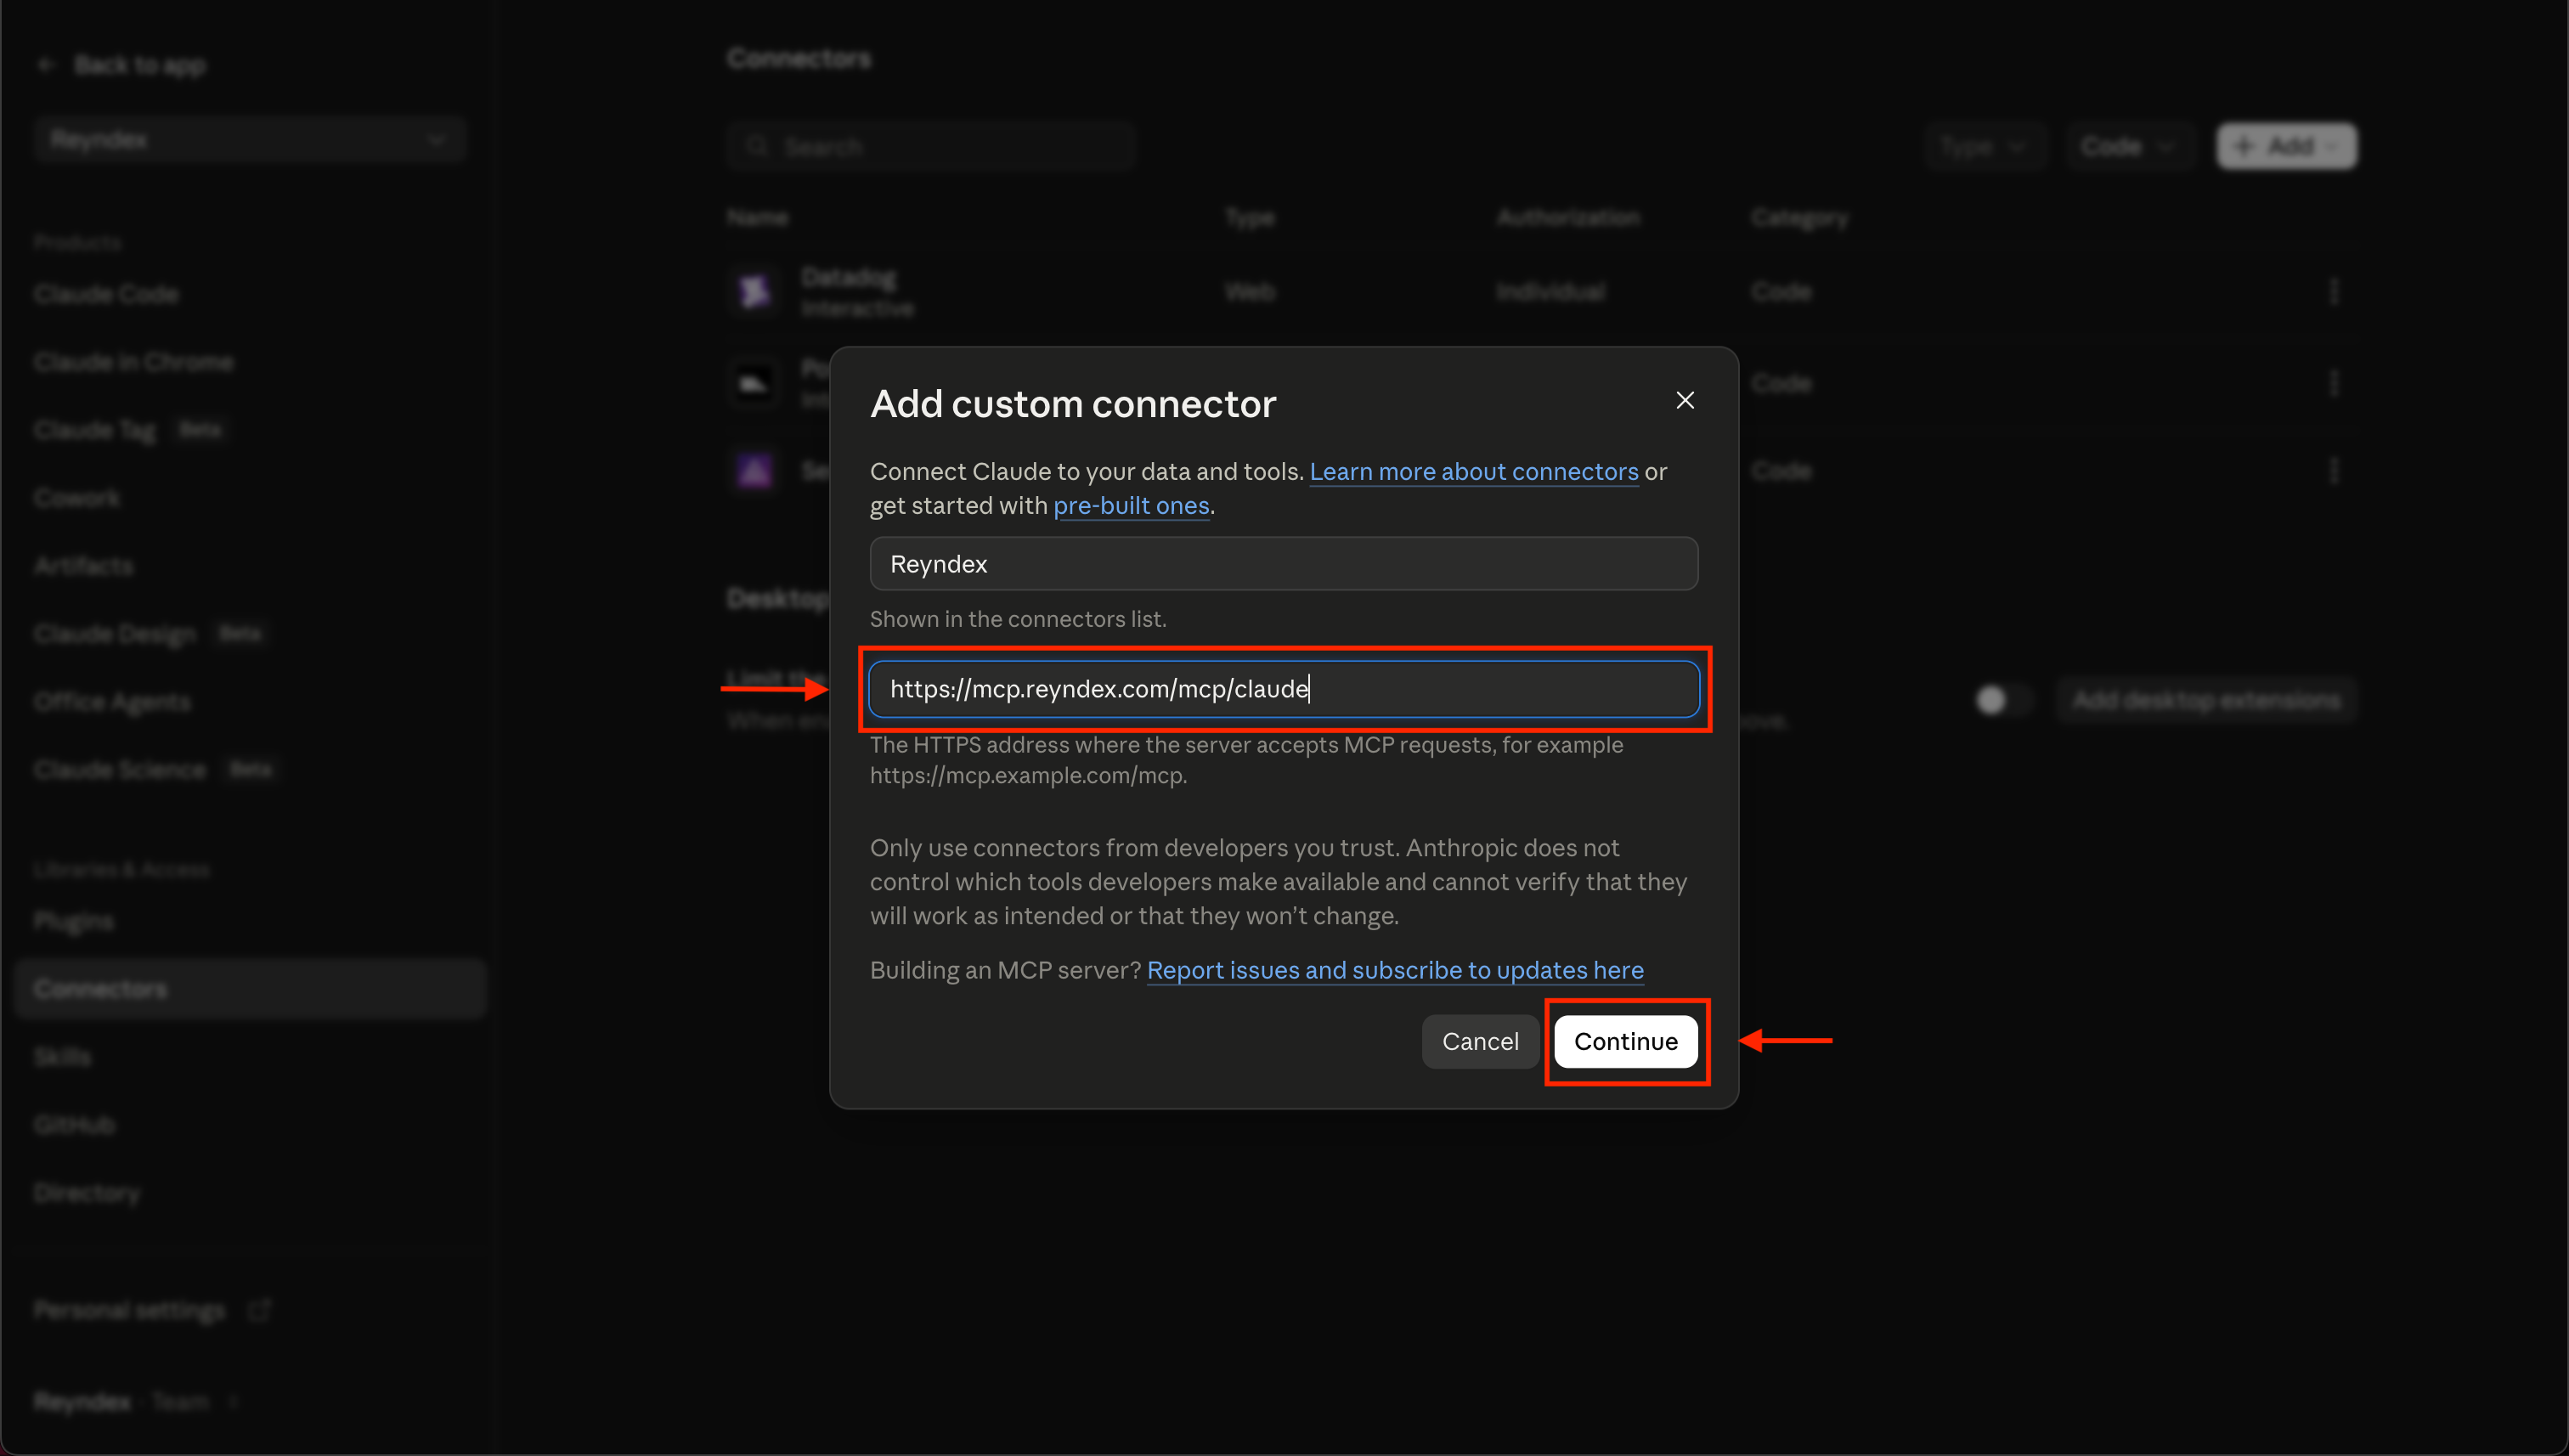
    Owner: Enter the connection URL

    Enter Reyndex as the name, paste the connection URL, then select Continue and finish adding the connector
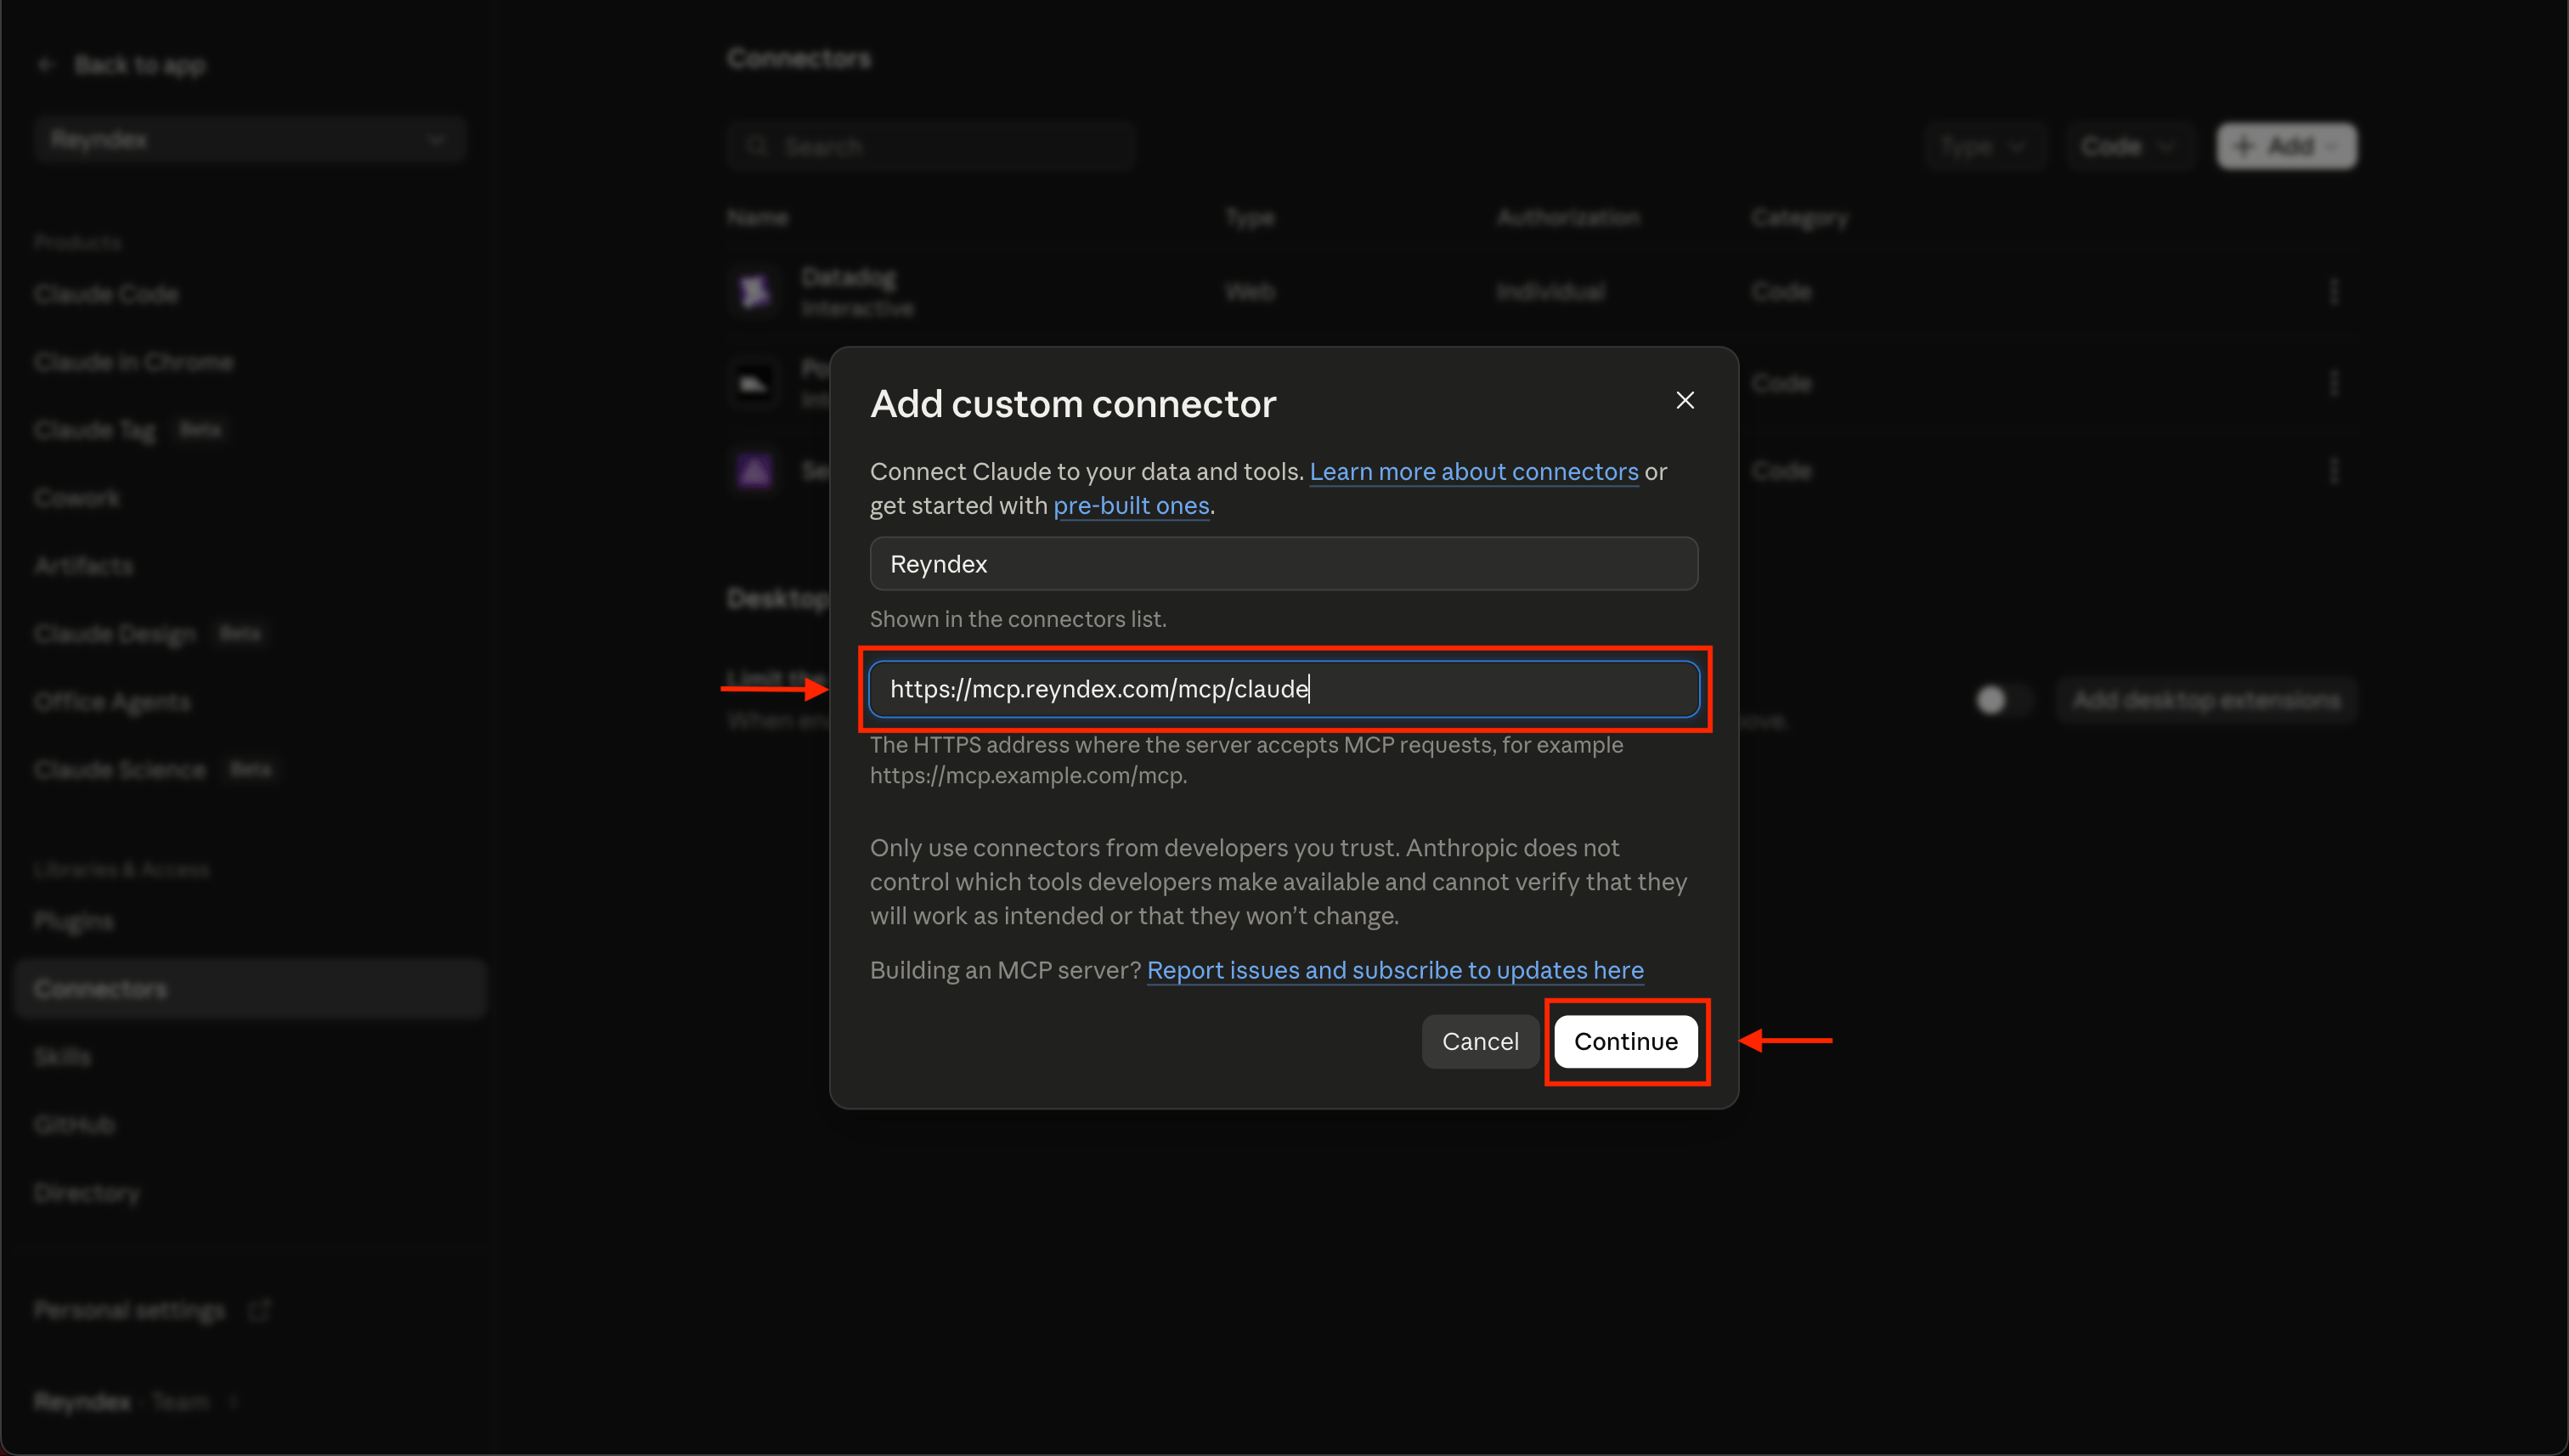
    Add custom connector dialog with the Reyndex connection URL entered and Continue highlightedOpen full size
  4. 04

    Member: Open Settings

    In Claude Desktop, open your profile menu in the bottom-left corner, then select Settings
    Claude Desktop profile menu open with Settings highlightedOpen full size
  5. 05

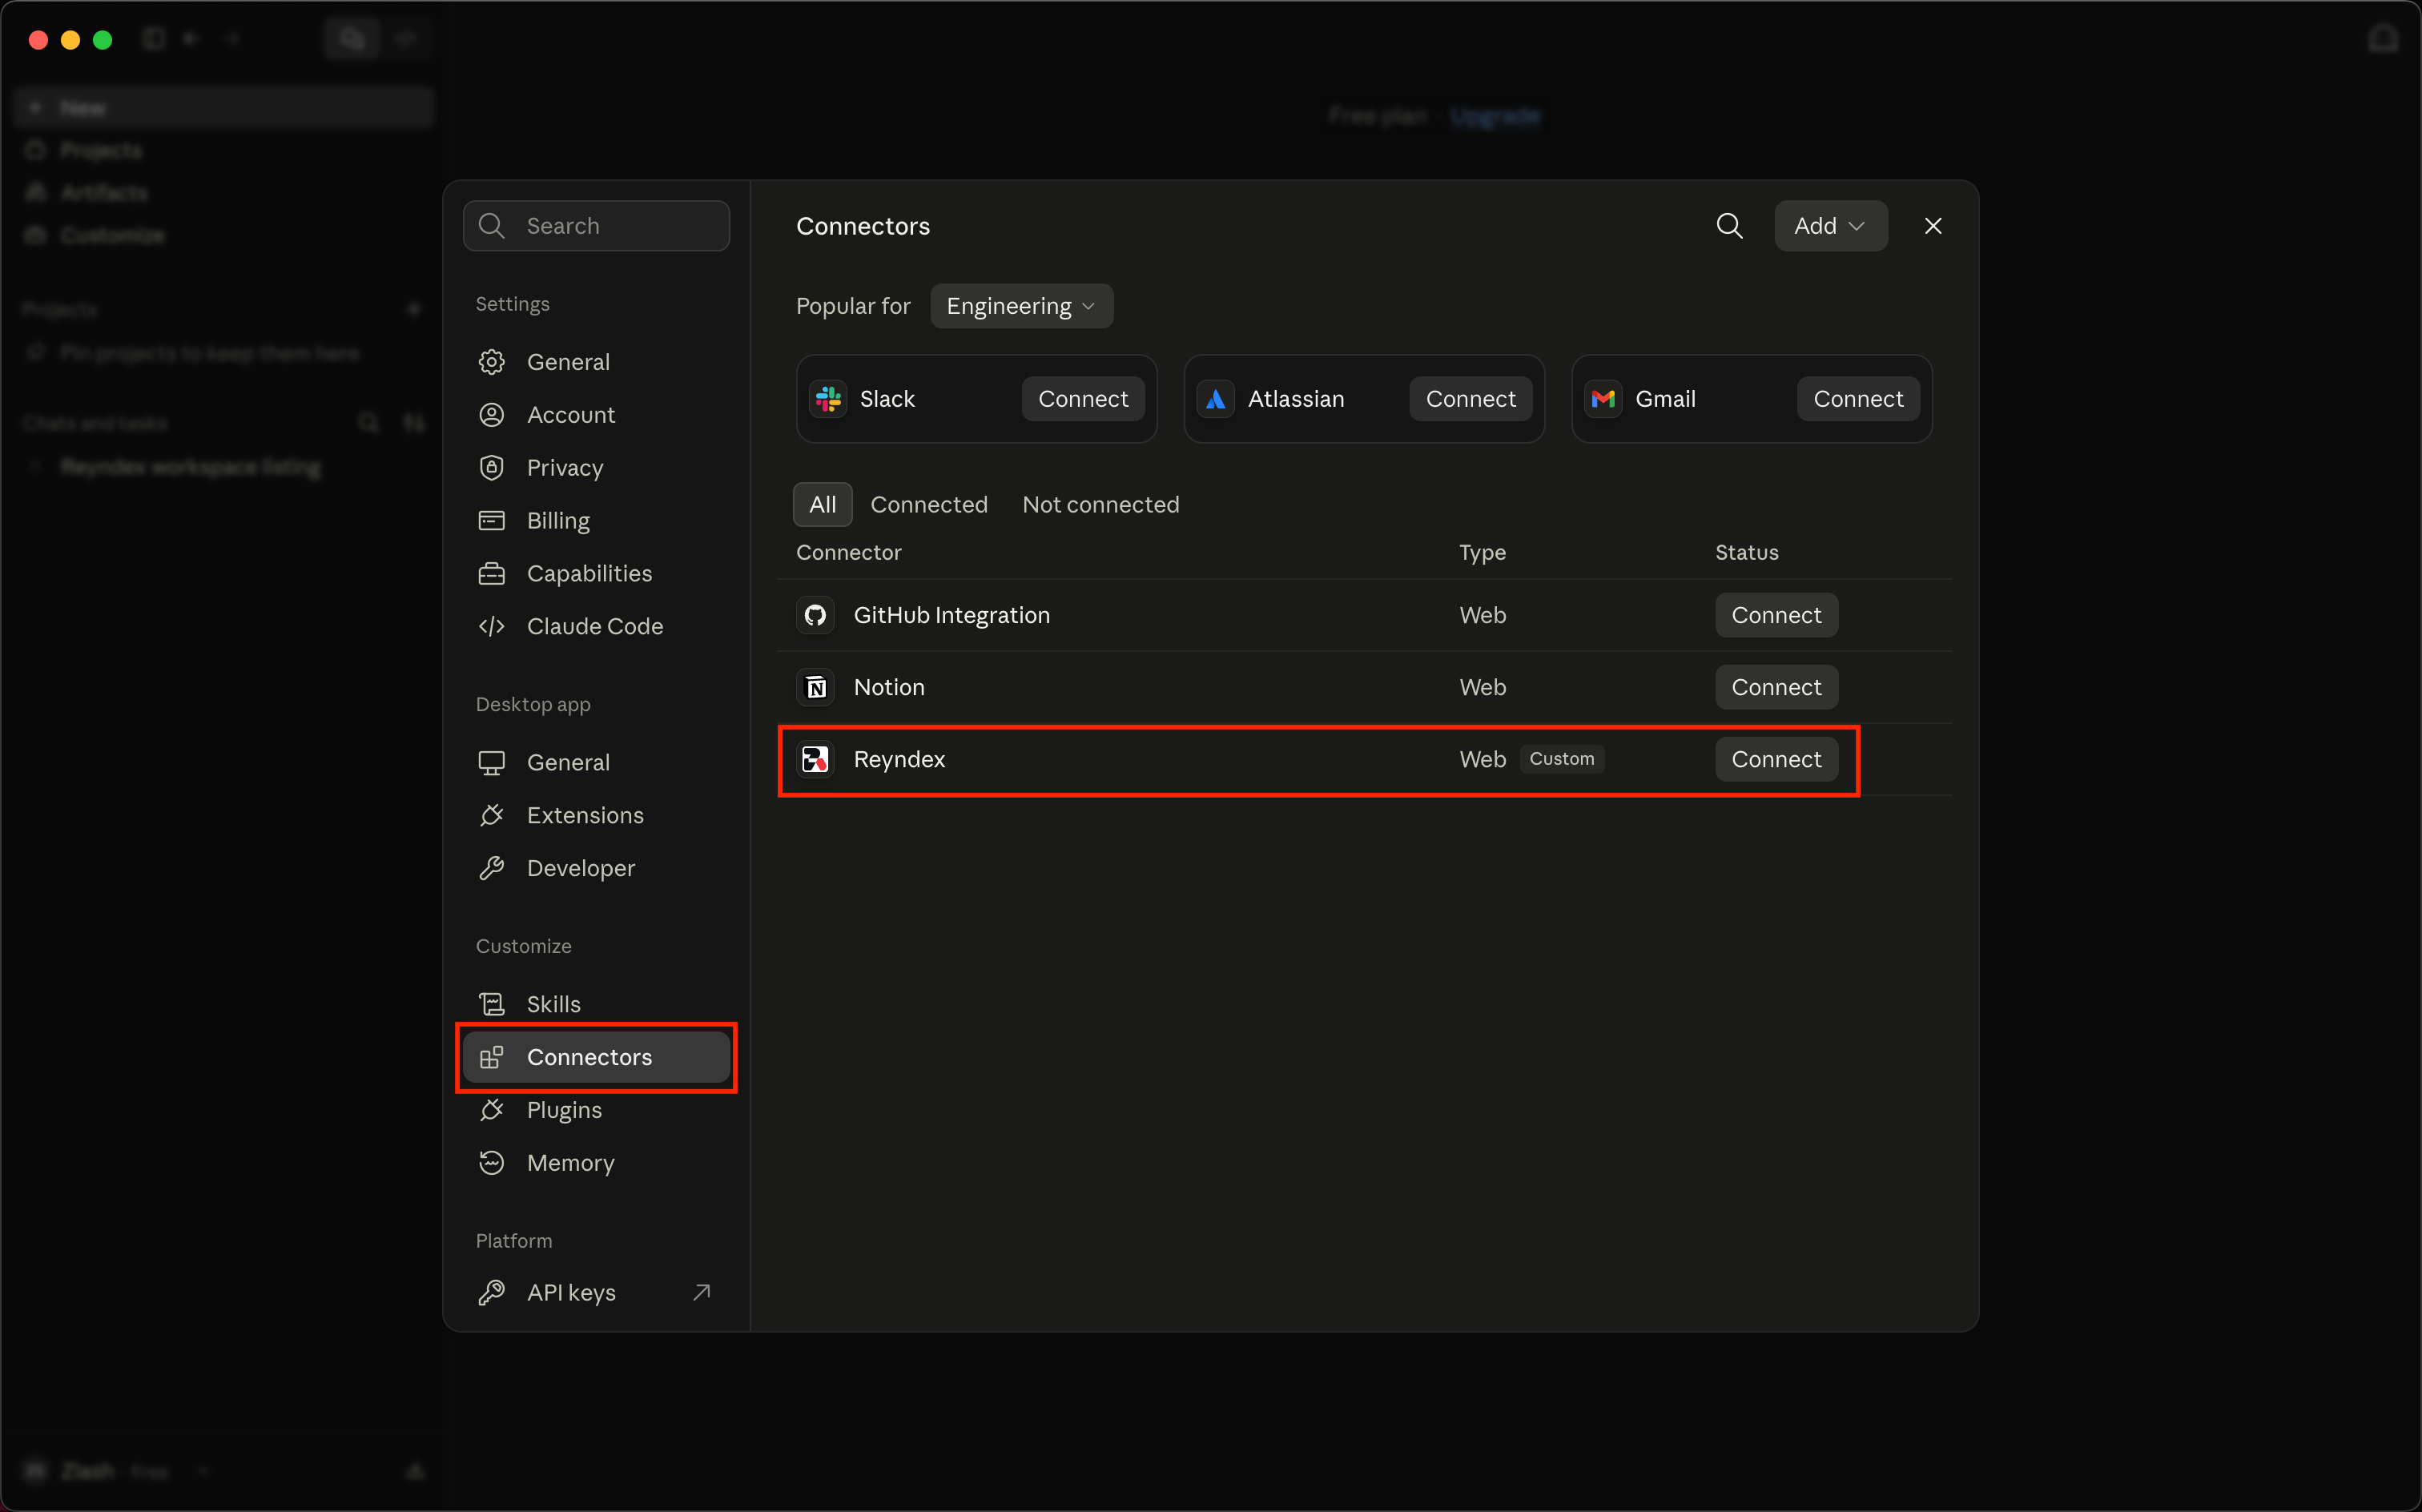
    Member: Connect Reyndex

    Go to CustomizeConnectors, find Reyndex, then select Connect
    Claude Desktop Connectors settings listing the Reyndex custom connector with Connect highlightedOpen full size
  6. 06

    Member: Approve read-only access

    Review the Reyndex consent screen, then select Connect to grant Claude read-only workspace and candidate access
    Reyndex consent screen showing read-only Claude workspace and candidate permissions with Connect highlightedOpen full size

Use Reyndex in a chat

Reyndex answers only in conversations where it is selected
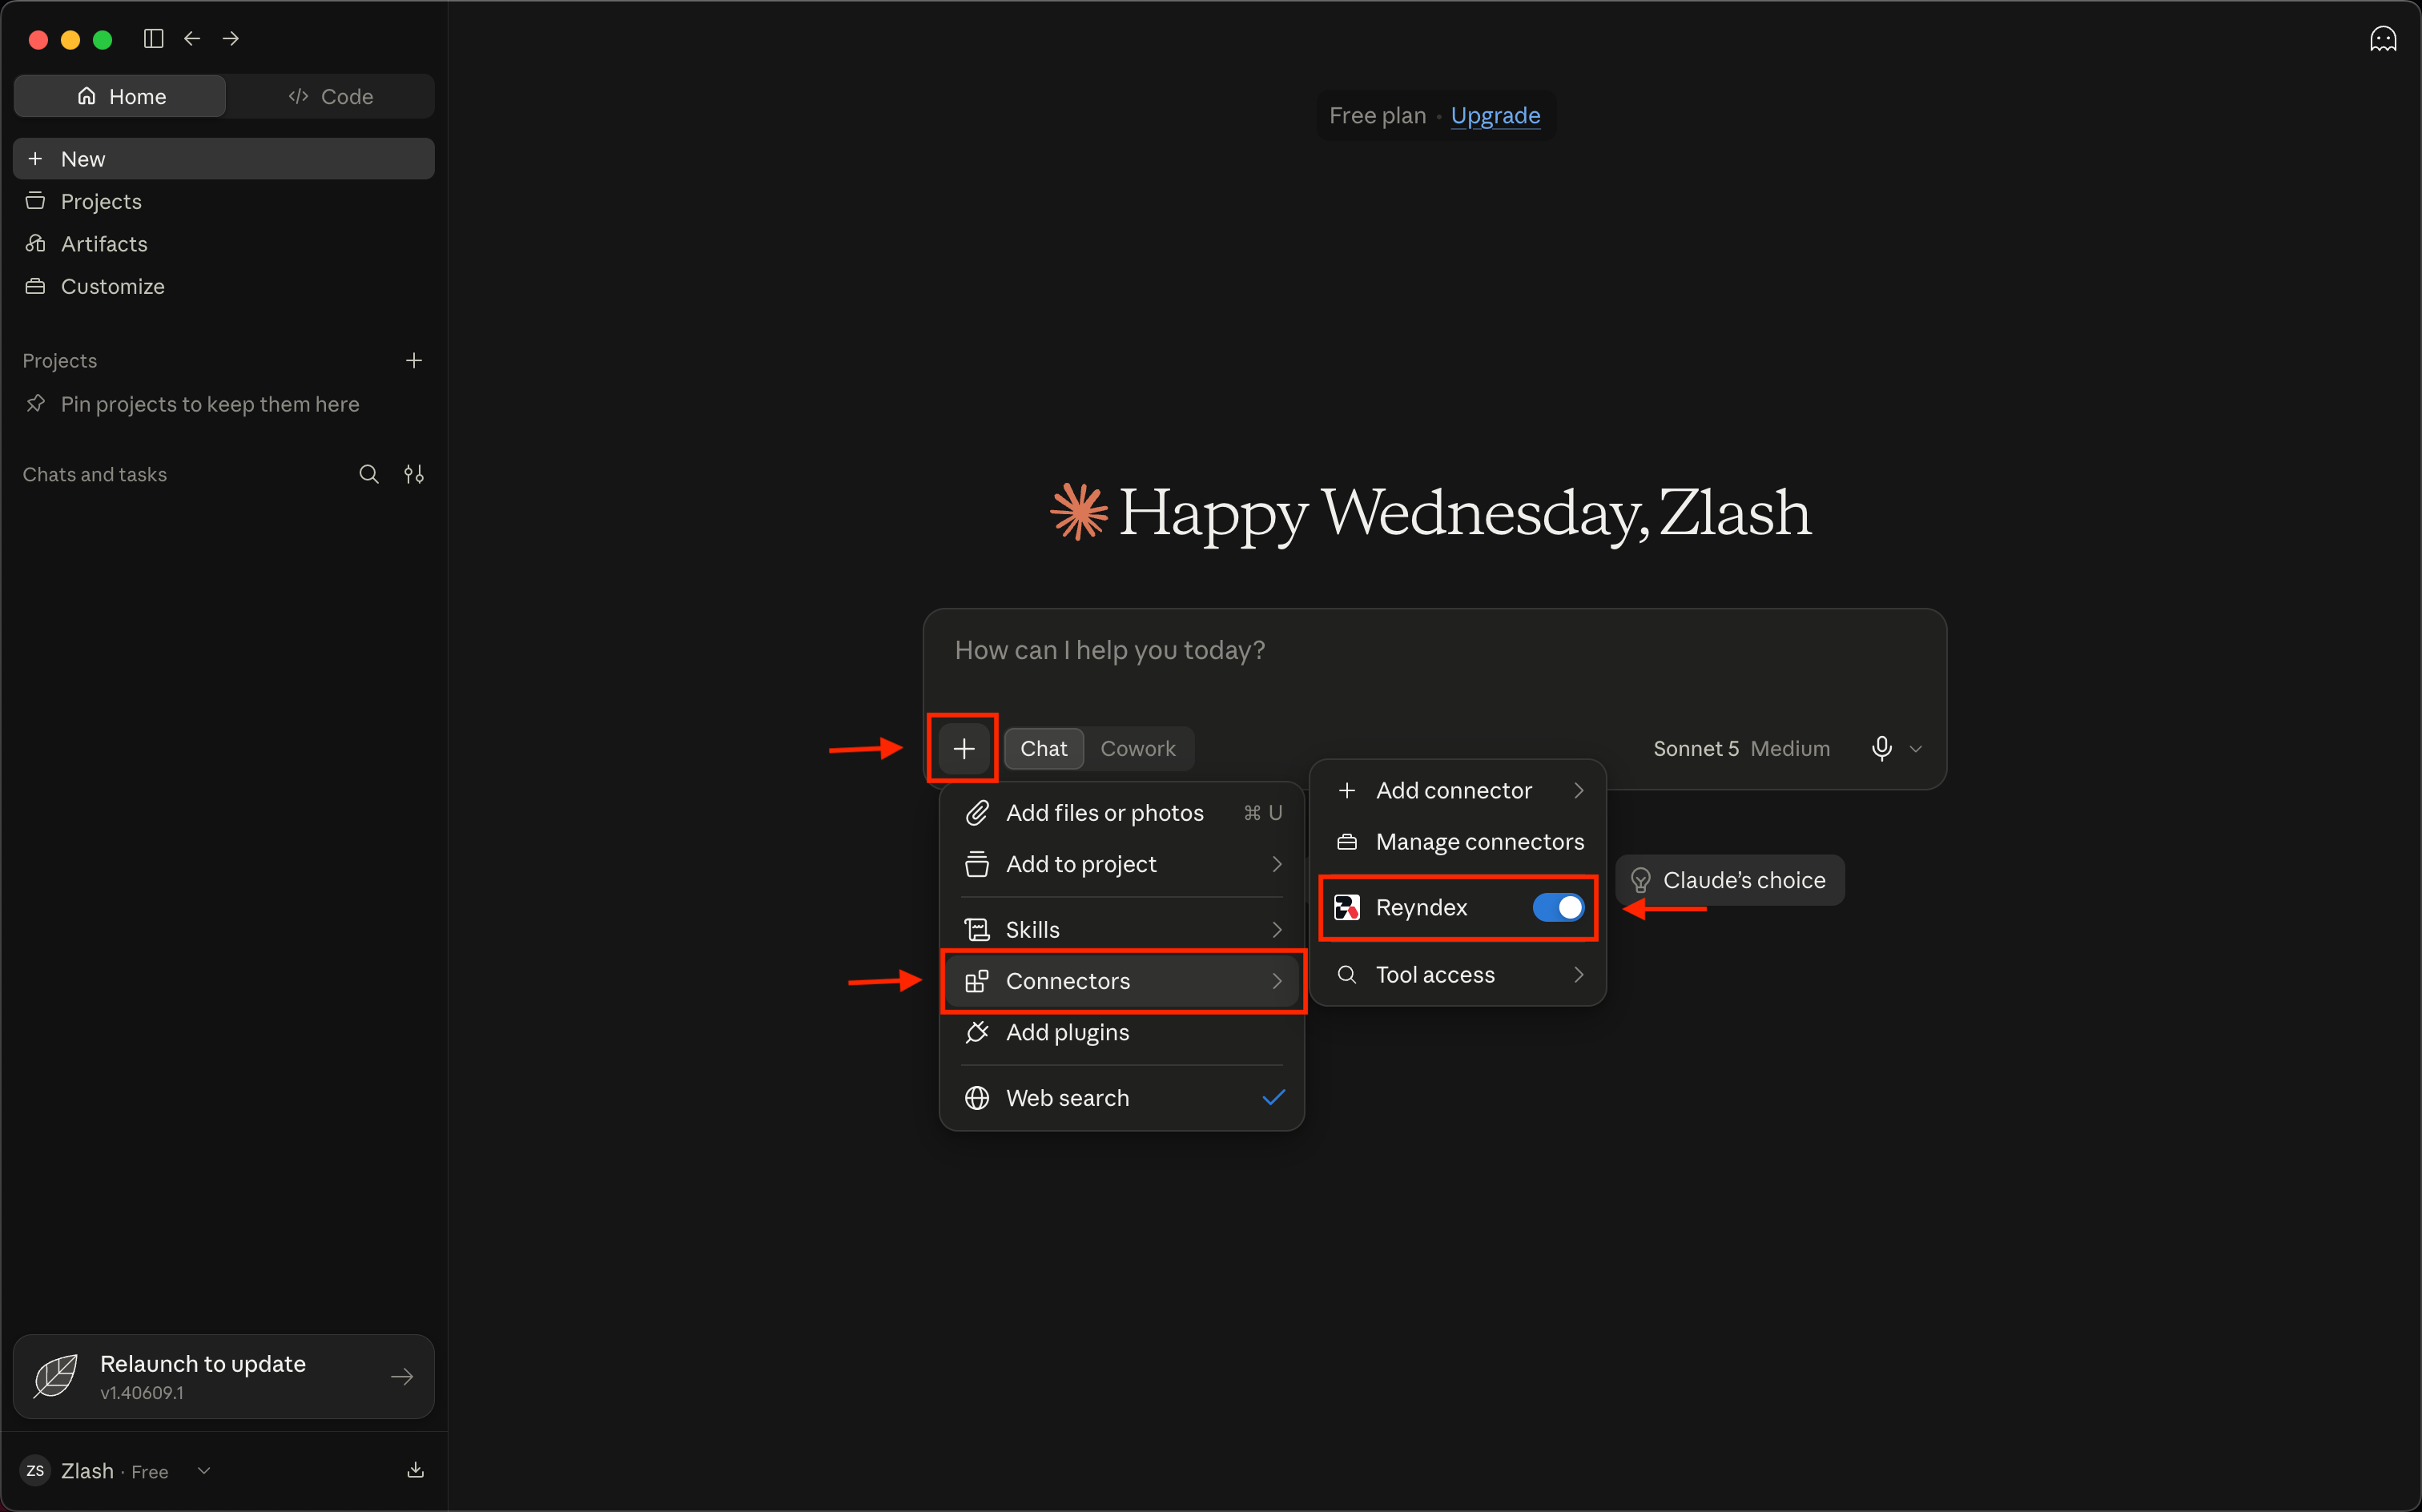
  1. 01

    Turn on Reyndex

    In a chat, select +Connectors, then turn on Reyndex
    Claude chat composer menu with Connectors and the Reyndex toggle highlightedOpen full size
  2. 02

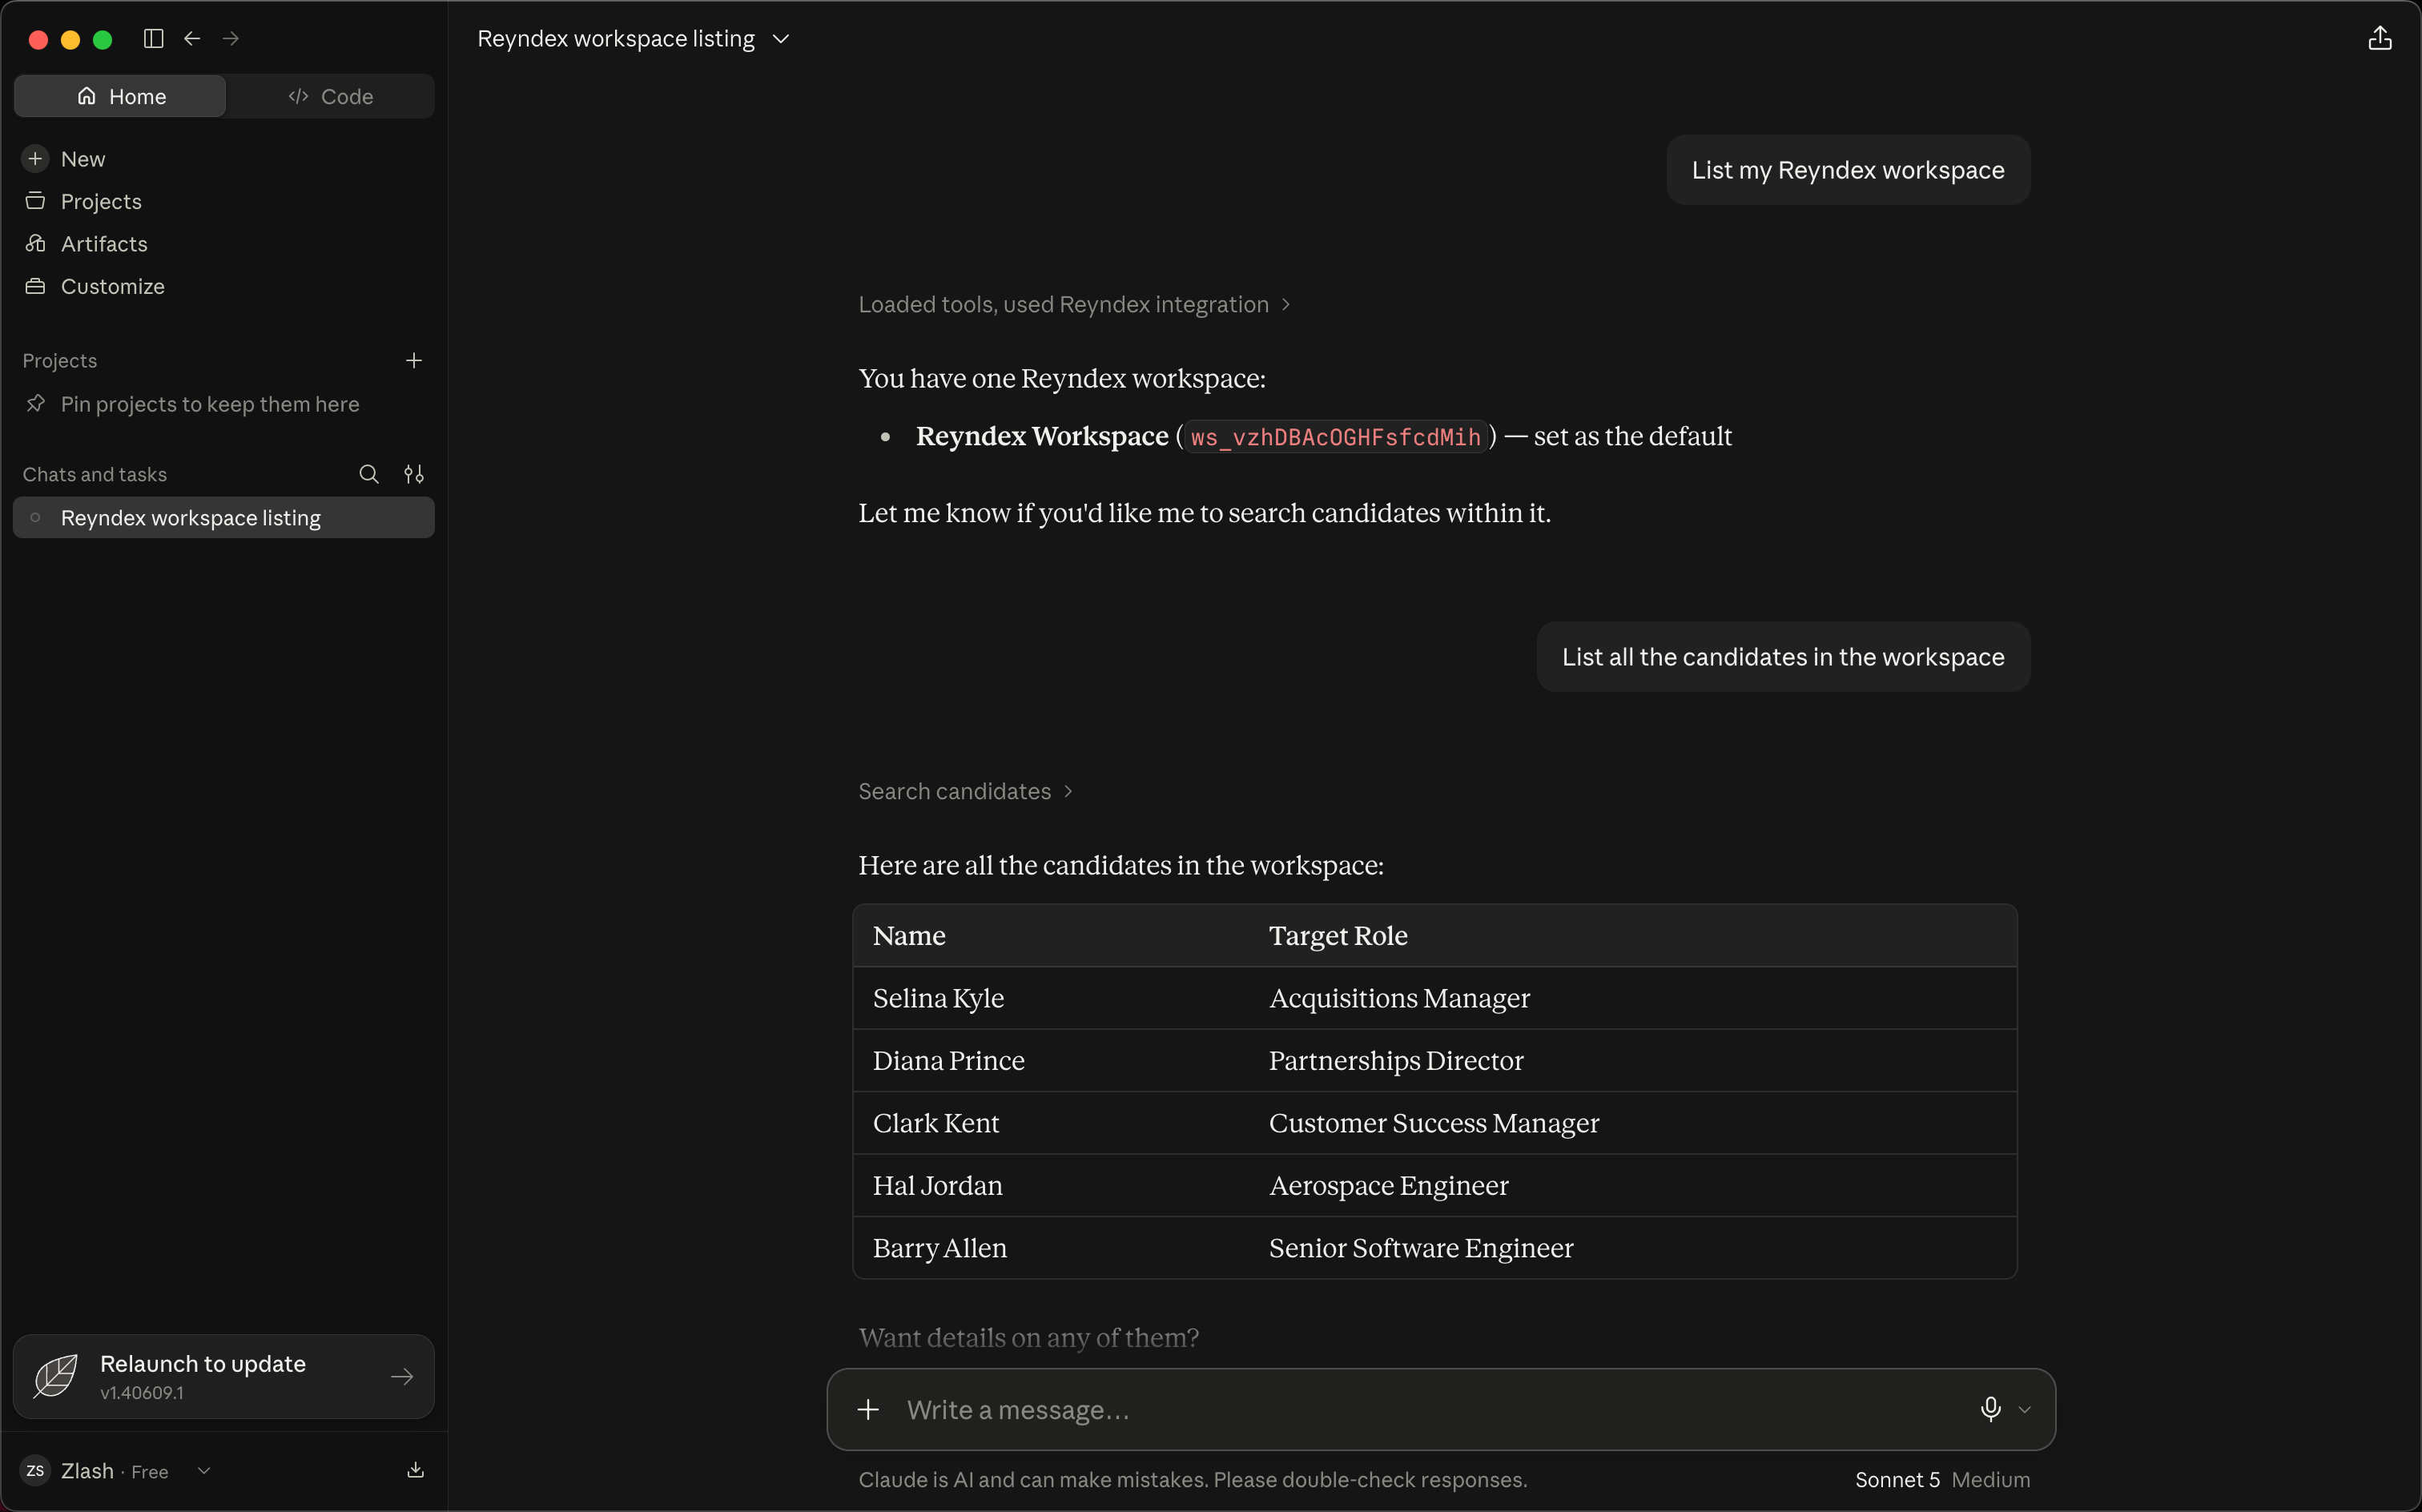
    Ask about your workspaces or candidates

    Ask for candidates by role, company, or name. If you belong to more than one workspace, name the workspace in your prompt
    Claude conversation showing Reyndex listing a workspace and returning five candidate recordsOpen full size

Disconnect Claude Desktop

Disconnecting in Reyndex stops Claude Desktop from reading any data until you connect it again from Claude Desktop

  1. 01

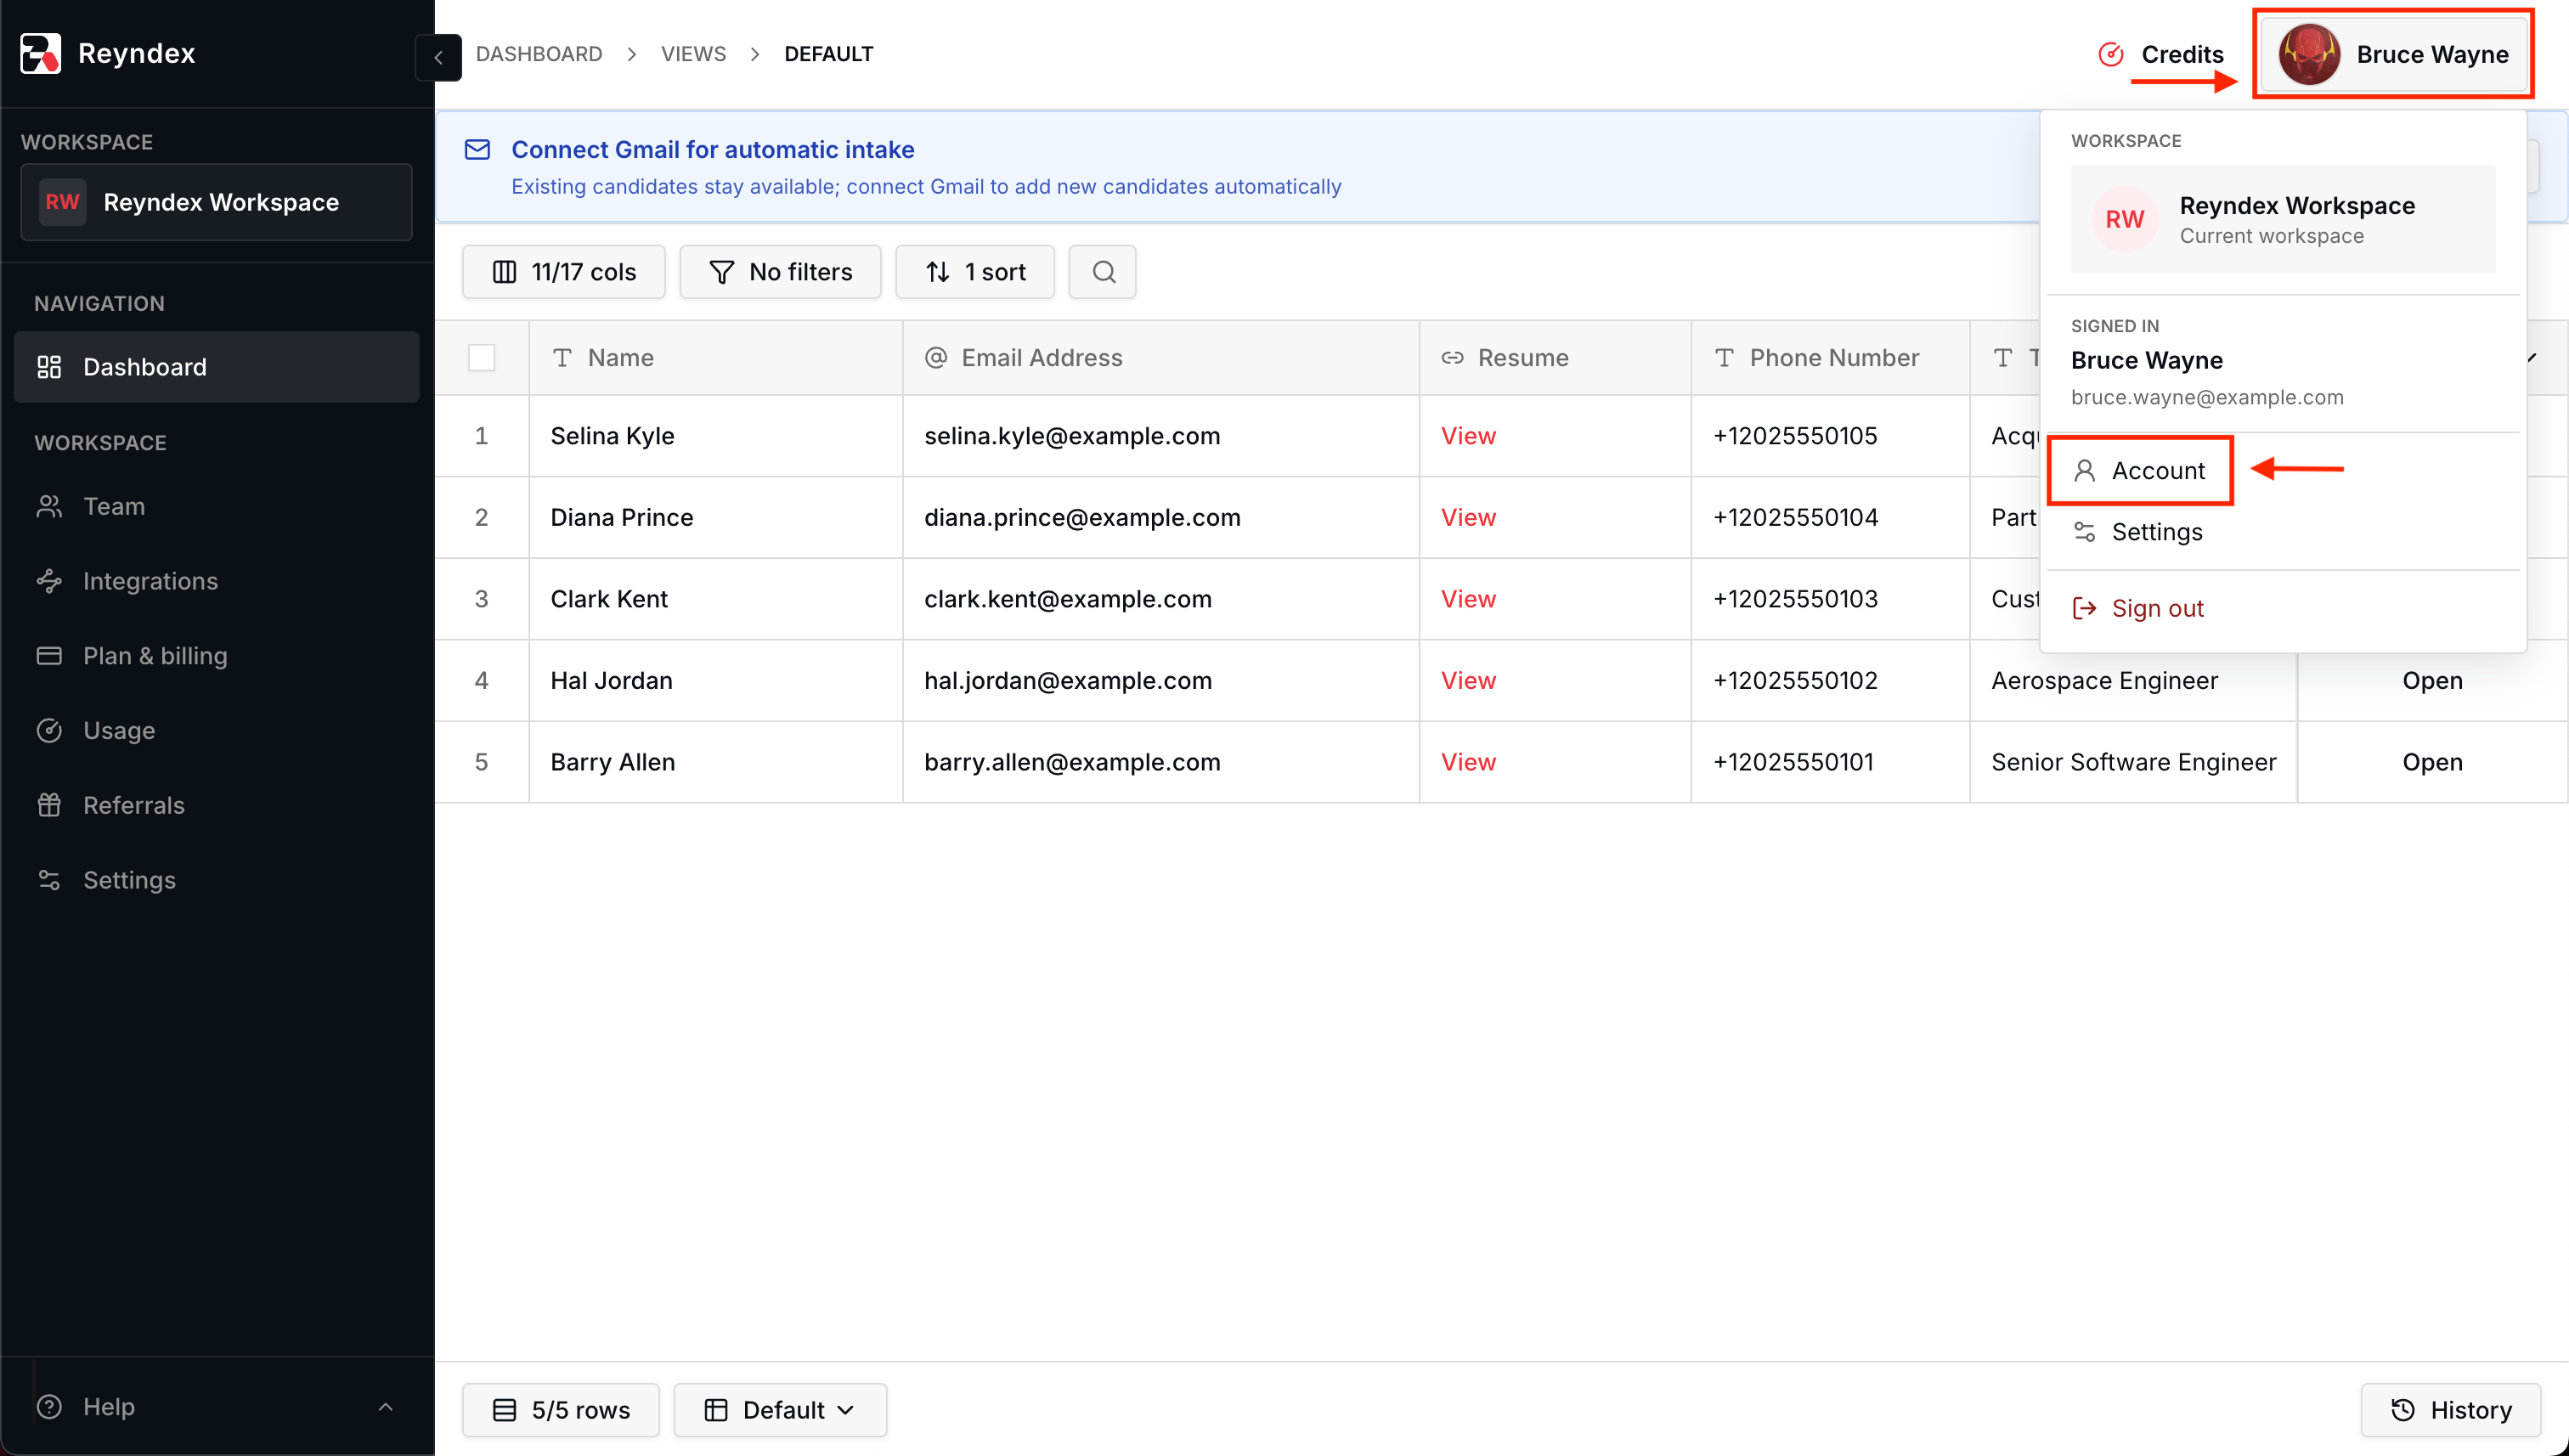
    Open Account

    In Reyndex, open your account menu in the top-right corner, then select Account
    Reyndex account menu open with Account highlightedOpen full size
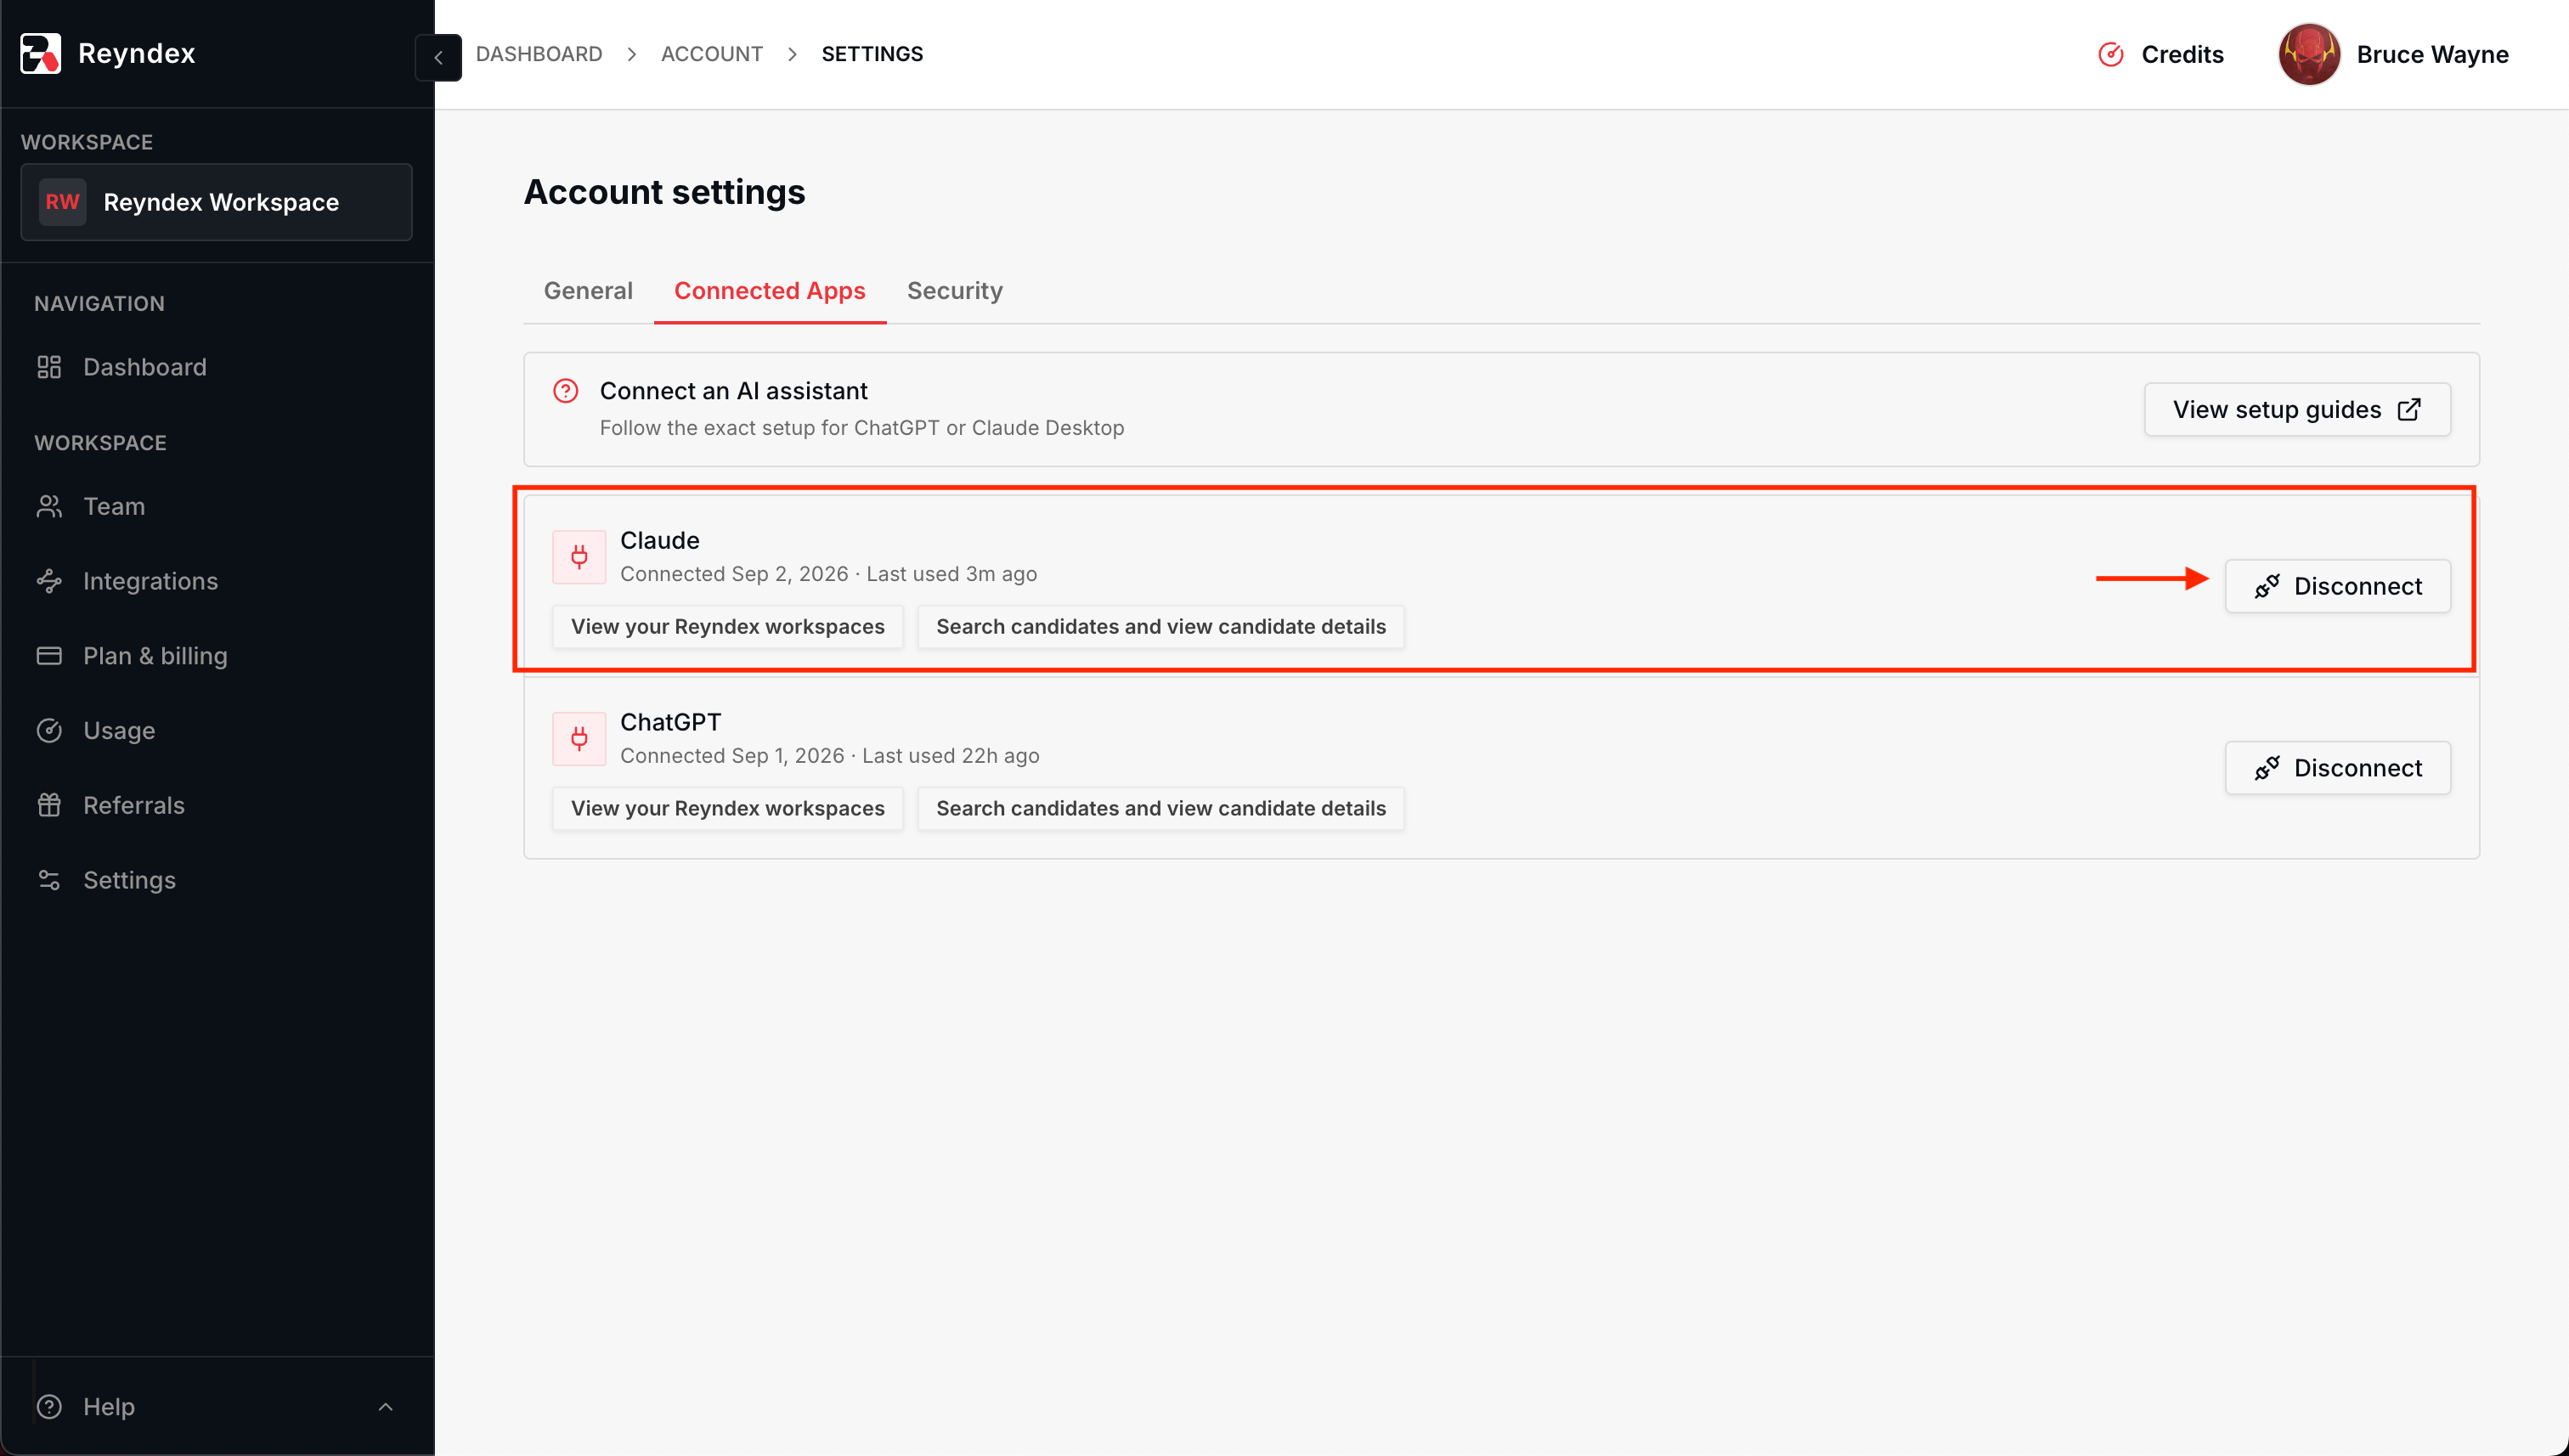
  2. 02

    Disconnect Claude

    Open the Connected Apps tab, then select Disconnect next to Claude
    Reyndex Connected Apps tab with Disconnect highlighted next to ClaudeOpen full size
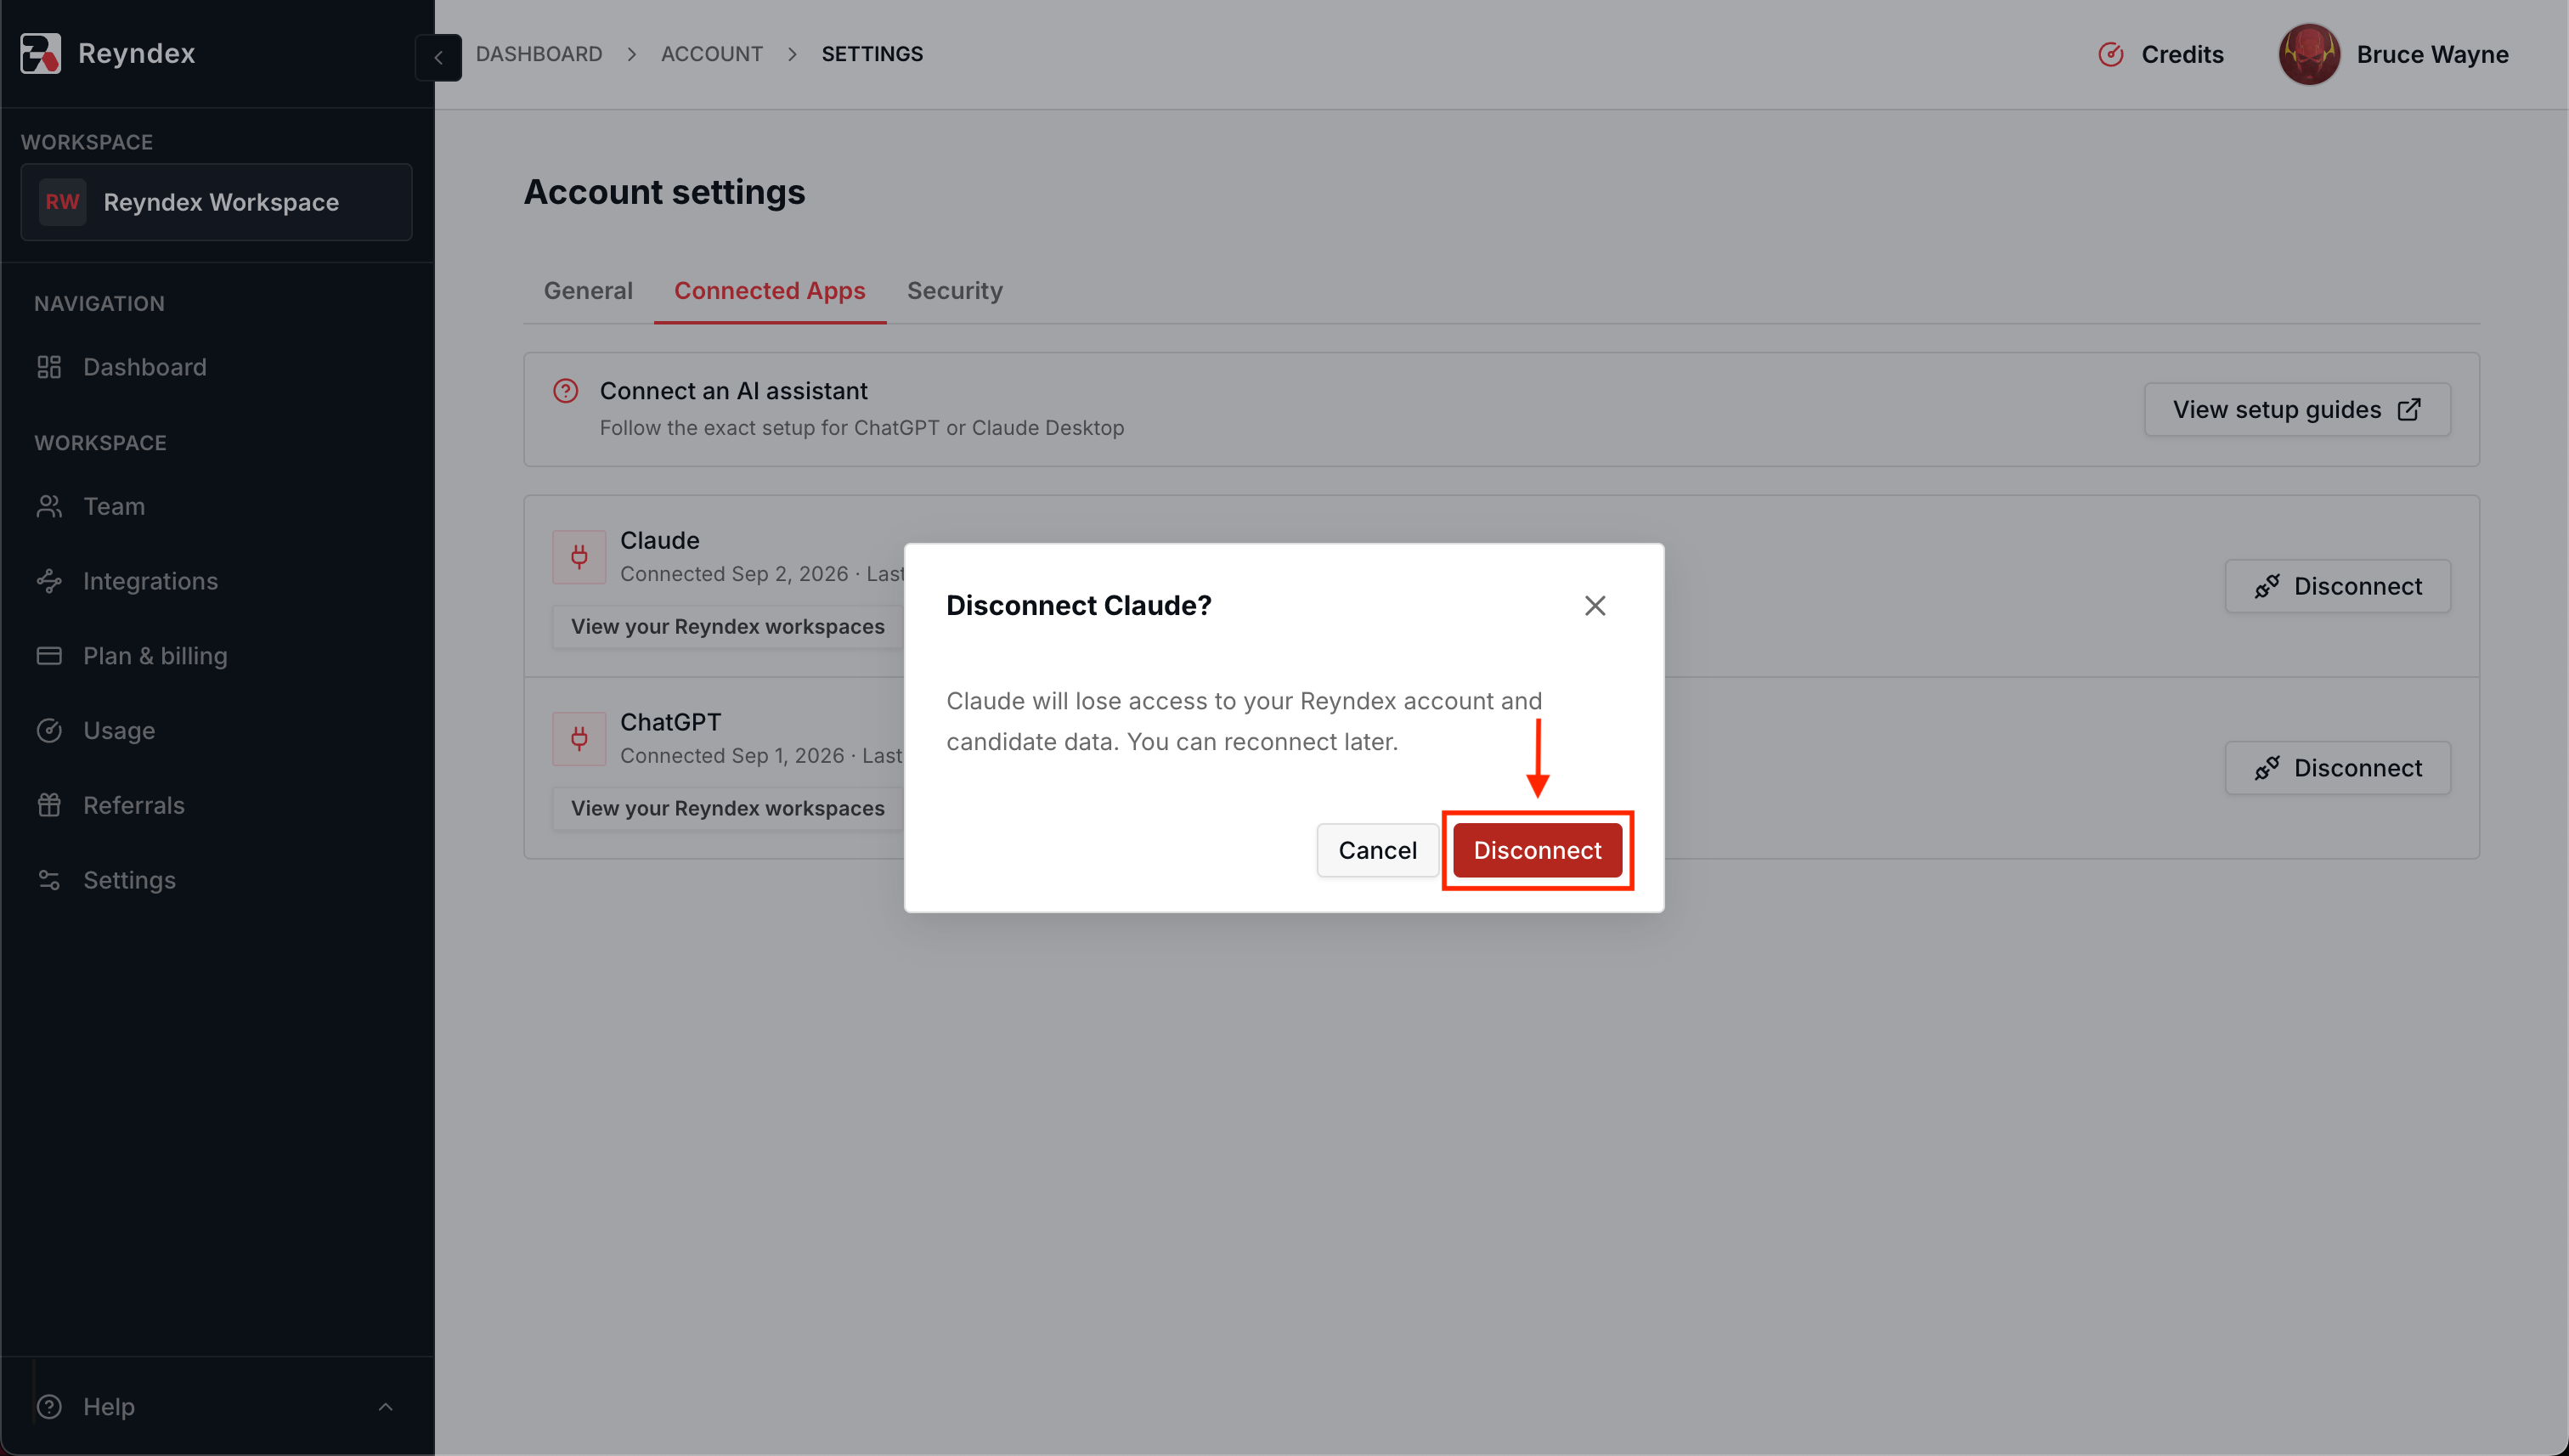
  3. 03

    Confirm

    Select Disconnect to confirm
    Disconnect Claude confirmation dialog with Disconnect highlightedOpen full size
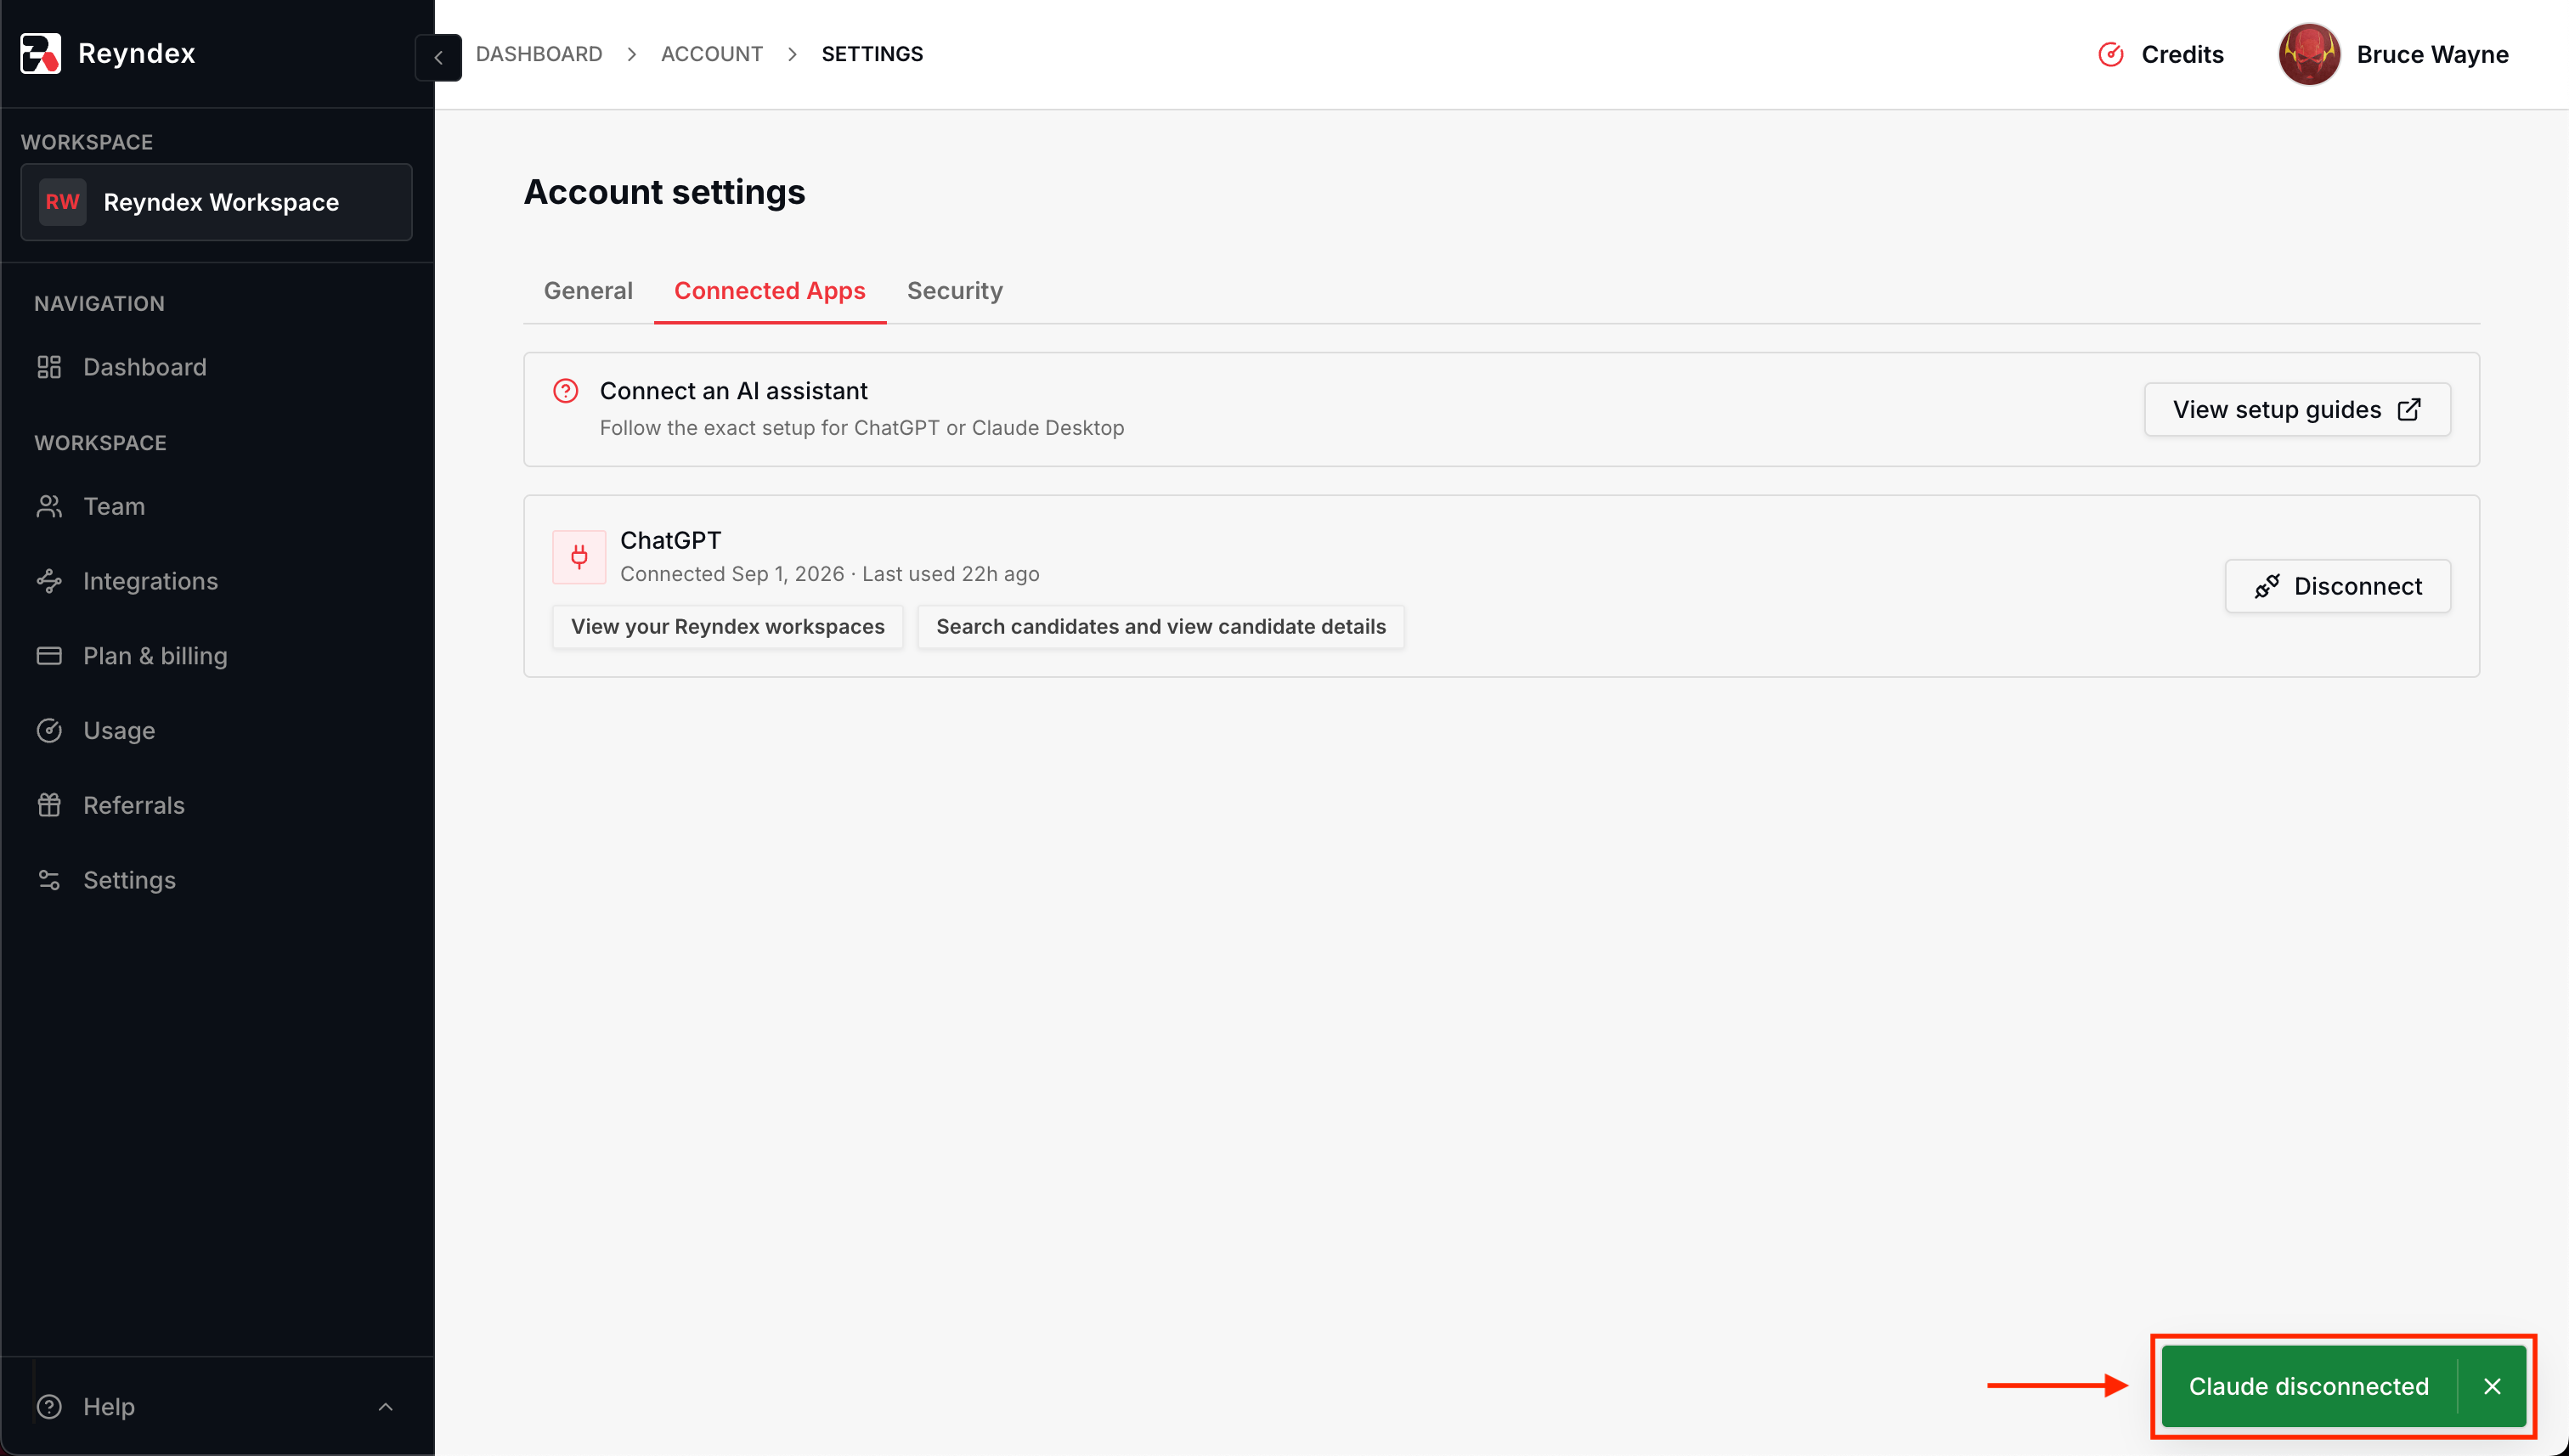
  4. 04

    Access revoked

    Claude is removed from Connected Apps and can no longer read Reyndex data until you select Connect again on the Reyndex connector in Claude
    Reyndex Connected Apps after disconnecting, showing the Claude disconnected toastOpen full size

Troubleshooting

Add fails or Claude reports it cannot reach the connector
Confirm the URL matches the connection URL exactly, ending in /mcp/claude, and that Authentication is set to Always required with automatic client registration. Retype the URL rather than editing a pasted value. See the Claude custom connector instructions.
Connect opens a browser but the consent screen never appears
Sign in with the Google account that owns your Reyndex account, not a different Google account in the same browser. If your Reyndex workspace requires two-factor authentication, you must complete it during sign-in before the consent screen appears.
Reyndex replies that MCP access is not enabled
Only workspaces with the MCP add-on are available to Claude. An Owner or Admin can add it from Reyndex billing. Reconnect after the add-on is active.
A candidate or workspace is missing from results
Reyndex returns candidates only from workspaces you belong to, up to 20 results per request. Search matches name, email, phone, target role, current company, current title, and skills. If you belong to more than one workspace, name the workspace in your prompt.
Reyndex worked before and now returns an authorization error
Access ends when someone disconnects Claude in Reyndex under AccountConnected Apps, or when your workspace turns on required two-factor authentication. Go to SettingsConnectors, select Reyndex, then choose Connect to authorize again.
Reyndex is connected but Claude does not use it
Connectors are enabled per conversation. In the composer, select +Connectors, then turn on Reyndex. If Needs approval is set, approve the tool call when Claude asks.